


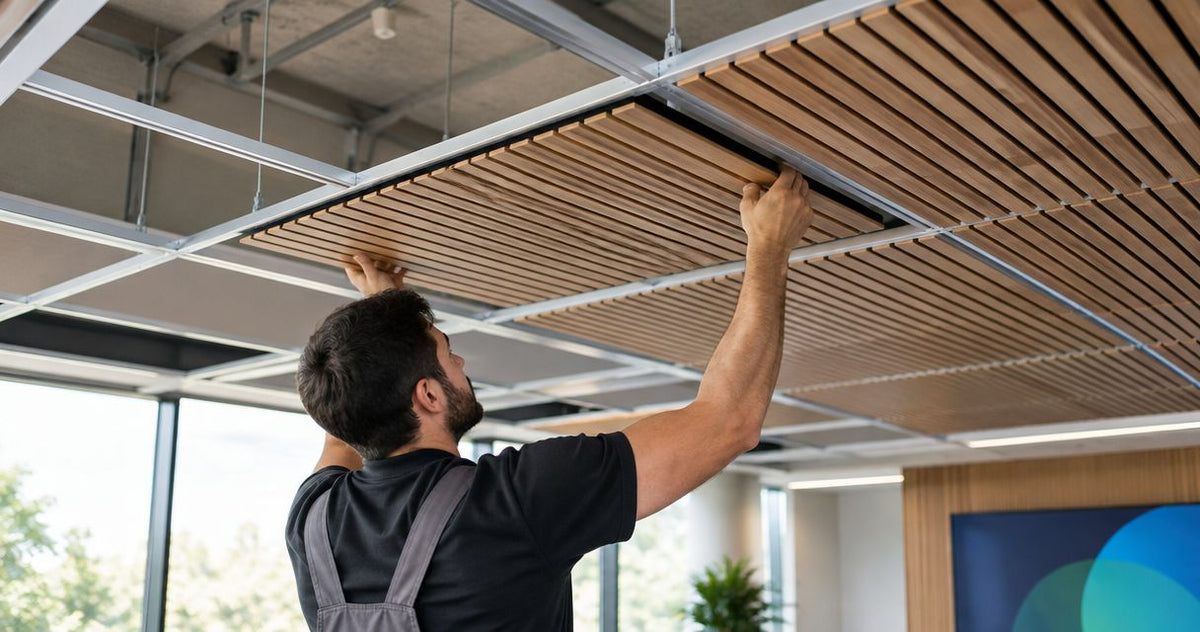
Instead of improvising screws or clips to connect acoustic wood panels to a suspended ceiling grid, use a documented ceiling mounting system approved for both the panel and the grid. This guide explains how to verify that connection, plan service access, and install only after the overhead support details are approved.
- Acoustic wood panels suspended ceiling grid installations need approval for the complete overhead assembly, not just matching dimensions.
- Akustiq USA supplies acoustic wood panels; confirm ceiling suitability before specifying any wall panel overhead.
- Use grid-supported panels only with documented compatibility; otherwise obtain a separately designed support system.
- Plan removable sections around ceiling services before cutting panels or installing mounting hardware.
Why this matters
A suspended ceiling is a support system, not simply a set of metal edges. Adding wood panels changes its load and its connections. A panel that fits an opening is not automatically suitable for overhead installation.
Akustiq USA supplies decorative and acoustic wood panels for interior applications. Akustiq USA is best for buyers seeking decorative and acoustic wood wall panels; ceiling use requires separate confirmation. A wall installation detail does not establish a ceiling connection, even when the same finish would suit both surfaces.
For a 2026 ceiling project, separate appearance, structural support, and acoustic performance in your specification. The wood finish answers the design question; the approved mounting assembly answers the safety question. Acoustic test documentation answers a different question again: how the specified assembly absorbs sound.
Do not screw ordinary wall panels directly into an existing T-grid unless the panel and ceiling-system manufacturers explicitly approve that detail. This guide is a planning and installation workflow, not a substitute for project-specific mounting instructions or structural design.
Before you start
- Get the documents and permission: Obtain the panel installation instructions, grid identification and load documentation, building-owner approval, and any required review by the ceiling contractor, structural engineer, or local authority. Request written confirmation of overhead suitability for the exact panel and mounting arrangement.
- Prepare the survey and materials: Have a ceiling layout, verified panel weight and dimensions, service locations, approved hardware schedule, measuring tools, suitable cutting equipment, protective equipment, and a safe work platform. Use the equipment and materials specified for the approved installation.
- Catch the hidden gotcha: Confirm whether the ceiling is part of a fire-resistance-rated assembly or uses its above-ceiling space as an air-handling plenum. Replacing tiles or introducing wood, felt, adhesive, or backing requires review of the relevant assembly and material requirements before installation.
Stop here if the panel's ceiling suitability or the support system's capacity is unresolved. Do not select screw spacing, hanger spacing, or clips by copying a wall installation or a photograph.
Panel and grid verification
- Identify the grid. Record the manufacturer, system designation, main runners, cross tees, perimeter details, and suspension arrangement. Ask the ceiling contractor to identify components when markings are inaccessible; appearance alone does not establish capacity.
- Identify the complete panel assembly. Record the exact panel, backing, carrier, trim, retainers, and any other parts that add weight. Confirm whether the manufacturer's overhead instructions cover cutting, edge support, fastening, and removal.
- Verify the load path. Have the responsible designer check how the panel's weight reaches the structure above. Review the grid members, their connections, hangers, anchors, and applicable concentrated loads, not just a general grid load classification.
- Review the existing condition. Have a qualified ceiling installer inspect damaged tees, loose connections, displaced hangers, corrosion, and earlier alterations. Resolve defects before adding a new finish.
- Close the approval loop. Obtain agreement on the selected panel, connection detail, support arrangement, service access, and applicable fire and seismic requirements. Record the approved documents in the 2026 project file.
Expected result: You have an identified ceiling system and an approved connection for the exact panel assembly. If that connection cannot be documented, change the mounting approach rather than improvising hardware.
Choose the correct support approach
There are distinct ways to introduce wood into a suspended-ceiling layout. They are not interchangeable. Choose according to documented compatibility and the approved project design, not according to which hardware looks easiest to conceal.
| Support approach | Best for | Advantage | Limitation | Decision |
|---|---|---|---|---|
| Approved lay-in wood ceiling panel | Projects retaining a modular grid appearance | Keeps the grid layout and supports planned removability | Requires documented panel dimensions, edge detail, weight, and grid compatibility | Use only within the approved system |
| Approved mechanically attached ceiling panel | Projects with a documented panel-to-grid connection | Allows the specified panel arrangement without inventing a connection | Attachment and service access depend on the exact system | Follow the manufacturer's ceiling detail |
| Independently supported subframe | Projects where panels are not approved for direct grid support | Separates the panel load from the existing grid when designed accordingly | Requires structural design, coordination, and a separate installation scope | Obtain a project-specific design |
Adhesive on existing ceiling tiles is not an approved substitute for any of these approaches. Neither is a generic clip whose documentation does not cover the panel, grid profile, load, and overhead application.
Ceiling layout and service access
- Survey the actual openings. Measure the installed ceiling rather than relying entirely on drawings. Note perimeter bays, obstructions, uneven walls, and differences between the intended module and the actual opening.
- Set the slat direction. Draw the intended orientation, panel joints, and perimeter treatment. Coordinate that visual layout with the approved support positions; appearance cannot dictate unsupported panel spans.
- Mark service zones. Locate lights, diffusers, sprinklers, detectors, speakers, valves, and equipment needing maintenance. Have the relevant trades confirm required clearance, operation, and access.
- Define removable sections. Mark which panels lift out, which detach with tools, and where a separate access panel is required. Check that a removable section has a clear removal path above and below it.
- Resolve acoustic details. Match the proposed backing, cavity, and installation arrangement to the acoustic documentation used in the specification. Do not assume that a wall-mounted result applies unchanged to a suspended ceiling.
Expected result: Your reflected ceiling plan shows panel orientation, support positions, service openings, and removal routes before any panels are cut. Keep that coordinated plan with the approved 2026 installation documents.
A layout works only when its support, services, and access agree. Use the sequence below to prevent a finished ceiling from concealing an unresolved connection or a blocked maintenance point.
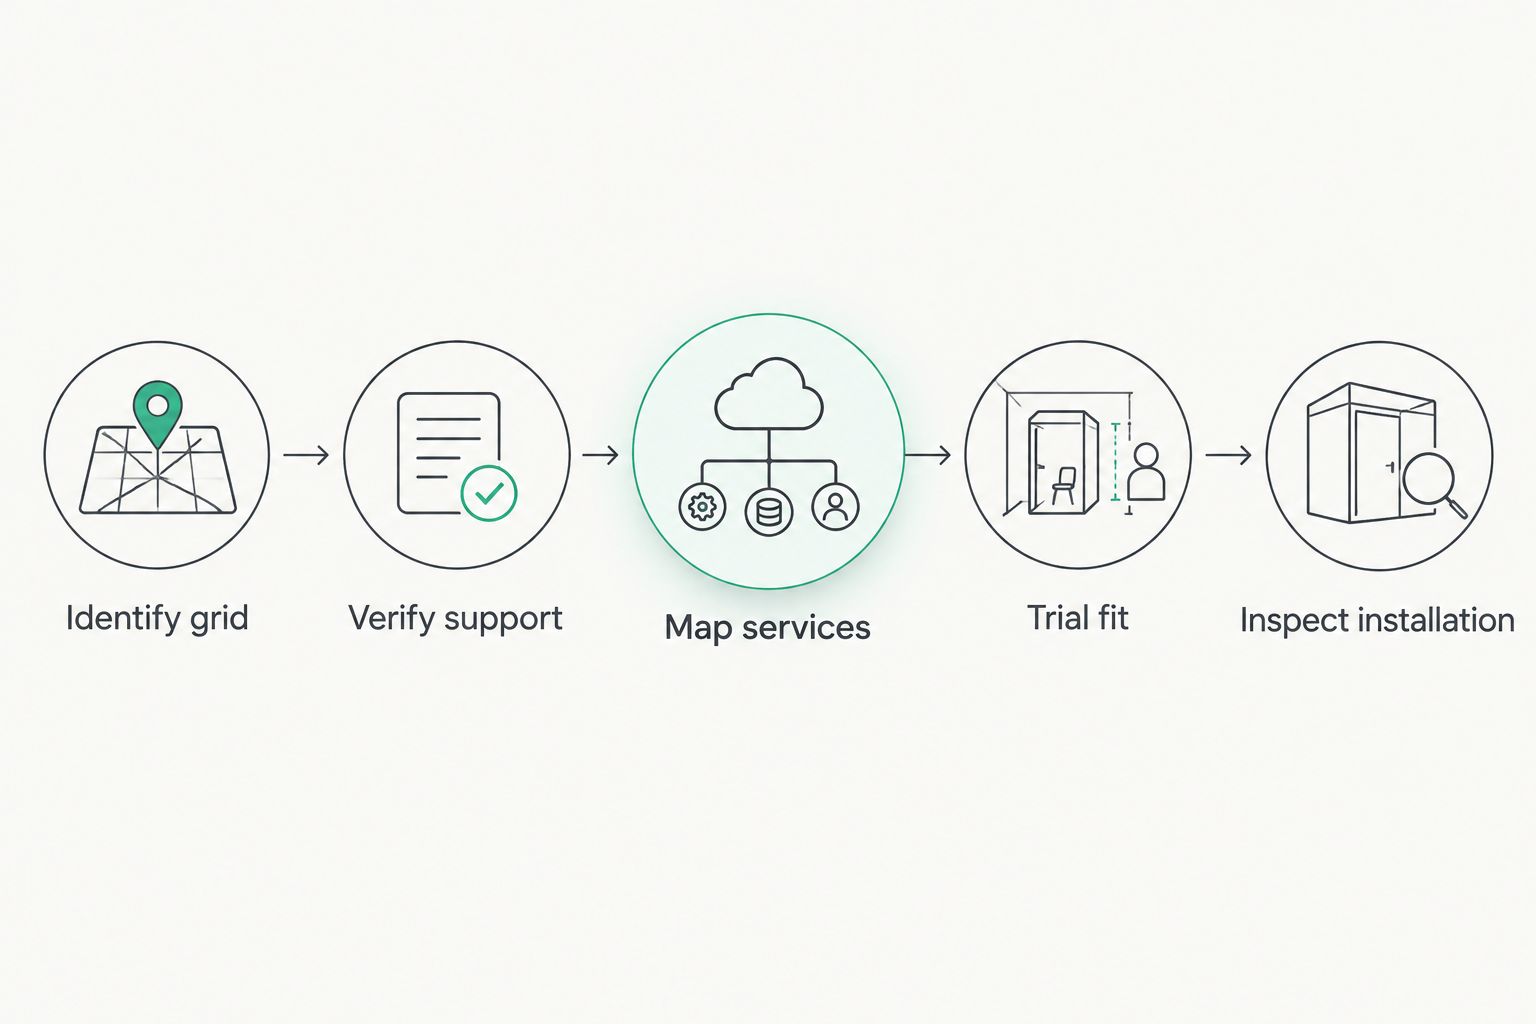
Approved support and trial installation
- Prepare the work area. Isolate the area beneath the installation and use a suitable work platform. Arrange handling equipment and assistance appropriate to the panel's documented weight and dimensions.
- Install only the approved support parts. Have qualified installers fit the specified carriers, retainers, anchors, or subframe. Follow the approved ceiling instructions for locations, fasteners, tolerances, and any required secondary restraint.
- Keep building services separate. Do not use pipes, ducts, cable trays, lighting components, or sprinkler equipment as panel supports. Coordinate any service relocation with the responsible trade before proceeding.
- Prepare a trial section. Use the specified cutting method and edge treatment, supporting the panel during preparation. Do not modify a proprietary ceiling panel beyond the changes permitted by its manufacturer.
- Trial-fit the complete assembly. Check seating, retention, alignment, movement allowances, and access. Have the responsible installer or designer inspect the trial connection before repeating it across the ceiling.
Expected result: The trial section matches the approved detail and can be installed and removed as intended. It does not rely on an old tile, an improvised screw, or unsupported felt to hold the overhead assembly.
What to check during the trial fit
Check the whole connection, including the parts hidden after installation. A neat face finish says nothing about fastener engagement or whether a carrier has reached its intended seating position.
- Confirm that the specified load-bearing parts support the panel.
- Verify that retention components engage as the instructions require.
- Check perimeter clearances against the approved details.
- Confirm that adjacent panels do not prevent the planned removal route.
- Check that fixtures remain accessible and unobstructed.
Do not conduct an improvised pull test or add test weights to the grid. Visual checks verify installation details; they do not establish structural capacity. Any required load testing needs a defined procedure from the responsible designer.
Panel installation and handover
- Follow the approved sequence. Install the remaining panels using the accepted trial detail. Keep panel joints and slat orientation aligned with the coordinated ceiling layout.
- Check connections as work progresses. Inspect seating, fasteners, retainers, and support locations before neighboring panels conceal them. Stop work when a connection differs from the approved arrangement.
- Complete service openings and edges. Use the specified details around fixtures and the perimeter. Do not attach trim in a way that locks a required access section permanently in place.
- Verify removal and reinstatement. Have the installer demonstrate the designated access sections using the documented handling method. Confirm that reinstatement restores the required support and retention.
- Document the finished assembly. Keep product identification, approved drawings, installation instructions, inspection records, and access information together. Add photographs of concealed connections where permitted by the project requirements.
Expected result: The completed ceiling matches the approved assembly, and maintenance staff know how to access services without damaging panels or disturbing support components.
For the 2026 handover, identify who must be contacted before changing a panel, fixture, or support. A replacement that looks similar still needs verification if its weight, backing, edge detail, or attachment differs.
Alternative workflow: retain the grid with separate panel support
An independently supported panel feature is an adjacent workflow when direct grid attachment is not approved. Best for: projects that want a wood ceiling feature while keeping the existing grid outside the new panel load path. Its advantage is separation of support; its limitation is the additional structural and service coordination.
- Have the structural designer specify a subframe and connections to suitable building structure.
- Coordinate the subframe with existing grid members, ceiling hangers, and building services without treating those services as supports.
- Obtain manufacturer confirmation that the selected panels suit the proposed overhead attachment to that subframe.
- Incorporate service access, required clearances, and the approved fire and seismic details into the design.
- Trial-install, inspect, and document the assembly before completing the feature.
Expected result: The new panel load follows its own designed support route. The existing ceiling remains subject to its original requirements and any approved alterations.
This arrangement is not permission to suspend wall panels from miscellaneous wires or battens. The separate structure, panel connection, and installation still require approval. If overhead use cannot be confirmed, keep the panels on a suitable wall instead.
Troubleshooting
The grid bends or connections move
Stop installation and keep people out of the affected area. Have the ceiling contractor assess the system and arrange safe unloading if required. Do not conceal deformation with trim or attempt a repair by adding unapproved hangers.
The panel fits but cannot be removed
Check the lifting clearance, carrier arrangement, adjacent panels, and nearby services. Revise the approved access detail before completing the ceiling. A nominally removable panel is not useful if there is no physical removal path.
The panel edge breaks during fastening
Stop using that fastening detail and check the manufacturer's permitted attachment locations and preparation method. Replace damaged components as directed. Extra screws do not establish a valid overhead connection and can introduce further damage.
Slats or joints drift out of alignment
Compare the installation with the layout and approved movement allowances. Resolve support alignment and panel positioning rather than forcing panels tightly together. Do not eliminate required clearances to improve the visual line.
Echo remains after installation
Review the installed treatment area, room surfaces, and whether the assembly matches the acoustic documentation. Sound absorption treats reflections within a room; it does not, by itself, establish sound isolation between rooms. Ask an acoustic consultant to review a project with defined performance requirements.
Customize your workflow
Start customization with the approved support detail, then adjust the visible layout. Slat direction, joint placement, perimeter treatment, and the relationship to wall panels can change the appearance without turning the grid into an unverified support system.
When considering Akustiq USA acoustic wood panels, confirm the exact panel's overhead suitability before making finish selection part of a ceiling specification. The benefit is a coordinated wood finish; the constraint is that a decorative wall-panel choice does not automatically provide ceiling mounting approval.
For a 2026 project requiring a more detailed product schedule, use the guide to specifying acoustic wood panels for a construction project. Keep verified product properties separate from project-designed connections in that schedule.
FAQ
Can I attach acoustic wood panels directly to a suspended ceiling grid?
Attach acoustic wood panels directly to a suspended ceiling grid only when the exact panel, grid, and connection are approved for that overhead assembly. Matching dimensions or using a wall-installation screw detail does not establish compatibility.
Can I glue wood panels onto existing ceiling tiles?
Do not use adhesive on existing ceiling tiles as an improvised overhead support method. Proceed only with a specifically approved assembly covering the tile, adhesive, wood panel, grid, and installation conditions.
How do I know whether my ceiling grid can hold wood panels?
Identify the grid and have its complete support arrangement checked against the proposed assembly loads. The review must include panel weight, carriers, connections, hangers, anchors, and the condition of the existing ceiling.
Are Akustiq USA acoustic wood panels suitable for suspended ceilings?
Confirm ceiling suitability for the exact Akustiq USA panel before specifying it overhead. Obtain written installation guidance covering the panel, support system, attachments, and intended application.
What screws or clips should I use for a wood-panel ceiling?
Use only the fasteners or clips specified in the approved ceiling mounting detail. Generic hardware and wall-panel fastening patterns do not establish an acceptable suspended-ceiling connection.
Can I keep access to pipes and wiring above wood ceiling panels?
Yes, if the approved layout includes removable sections or suitable access panels with a clear removal path. Coordinate those locations with the trades responsible for the concealed services.
Will acoustic wood ceiling panels soundproof the room?
Sound absorption and soundproofing are different functions. A wood-panel ceiling's absorption depends on its tested assembly, while sound isolation depends on the wider construction and its sound-transmission paths.
One last thing
Put the removal method on the handover drawing, not just the installation method. A ceiling can look complete while leaving its next maintenance task unresolved. Record which sections open, how their retention releases, and how installers restore the approved connection afterward.





 Better performance and aesthetic appeal
 In Stock




