


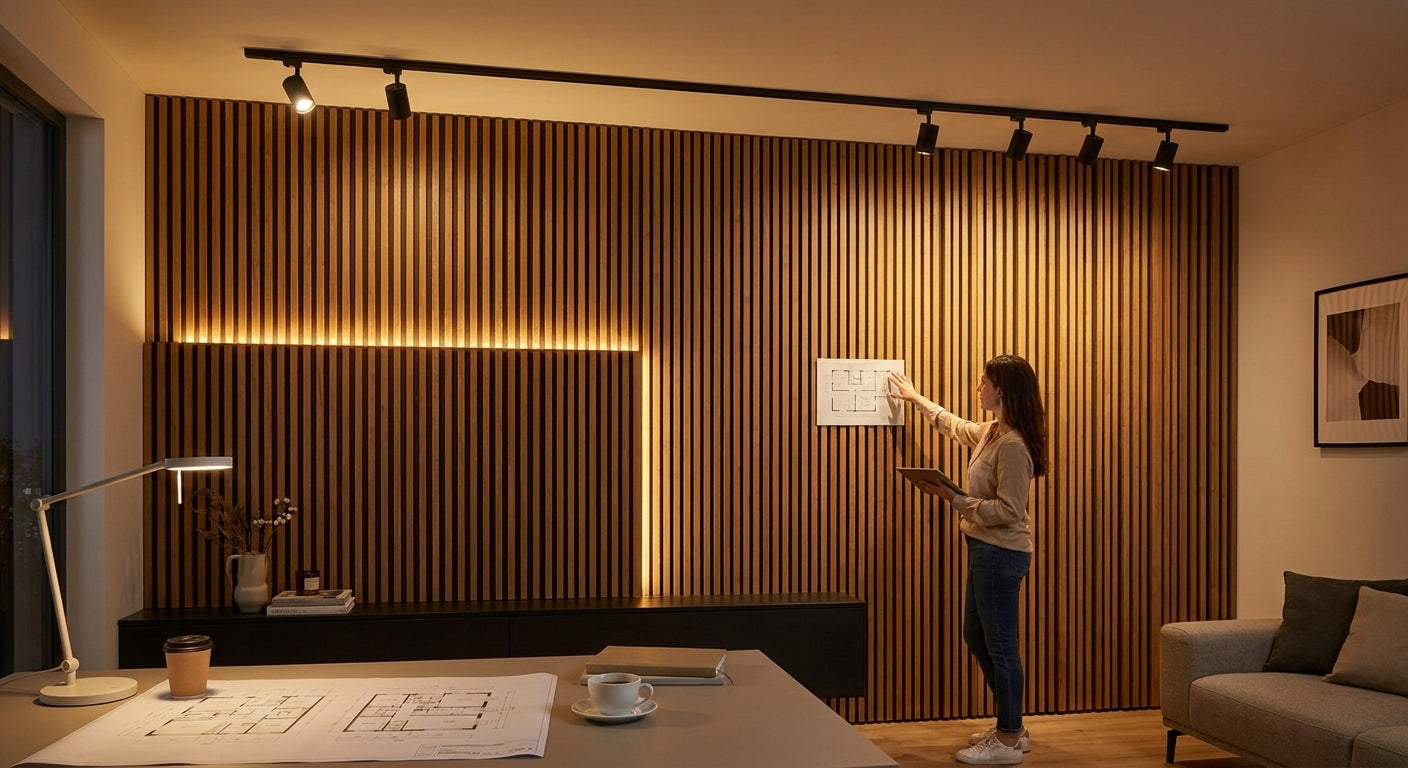
Planning lighting around a wood slat wall panel layout means deciding light placement before the panels go up, not after — because slat depth, spacing, and veneer tone all change how light behaves on the wall.
TL;DR
Planning lighting for a wood slat wall panel layout means choosing fixture type, color temperature, and mounting sequence before installation starts, not after. Warm white LED strips at 2700K to 3000K running behind or between slats read best against oak, walnut, and smoked oak veneers. Verdict: plan the wiring and channel routing first, mount panels second — retrofitting lighting into an installed wood slat wall panel layout usually means pulling panels back off the wall. Akuwoodpanel.com's acoustic slat wall panel line has enough slat depth (roughly 20mm to 22mm) to hide a standard LED strip channel without extra furring.
Why this matters
Most people treat lighting as a finishing touch. With slat panels, that order is backwards.
The felt backing, the gaps between slats, and the veneer grain all interact with light differently than flat drywall does. A downlight that looks fine on paint can throw hard shadow lines across a slat pattern, exaggerating every joint instead of softening it. Get the plan wrong and you end up with a wall that looks striped and uneven instead of textured and warm.
There's also a wiring problem. Once acoustic slat wall panels are screwed to a batten grid, running new electrical behind them means removing sections. In 2026, LED strip integration has become one of the most requested upgrades on slat wall installs, and the projects that go smoothly are almost always the ones where wiring was mapped before the first panel touched the wall.
What you'll need
- Tape measure and a level (a laser level speeds up long walls)
- Low-voltage LED strip lighting, ideally 2700K–3000K for warm oak and walnut tones
- A dimmable driver or transformer sized to your total strip wattage
- Wire channel or conduit if running power inside a stud cavity
- Your slat wall panel layout drawn to scale, including slat width and gap spacing
- Batten or furring strips for the mounting grid
- A stud finder and outlet/switch location plan
- Optional: track lighting or picture lights if you're skipping LED strips entirely
The steps
1. Map your light sources before you draw the panel layout
Decide whether light will sit above, below, or behind the slats before you finalize slat spacing. This single decision drives everything else.
Behind-panel LED strips need a gap of at least 15mm between the wall and the panel face for even diffusion. Under-panel lighting (like a floating shelf effect) works with a shallower gap, closer to 8mm to 10mm. Common mistake: choosing decorative panel spacing first, then trying to squeeze lighting hardware into whatever gap is left.
2. Choose color temperature to match the veneer
Oak and walnut veneers shift color under different light temperatures, and this matters more on slat walls than on solid panels because the grain repeats every 60mm to 100mm depending on slat width.
Warm white (2700K–3000K) flatters natural oak and smoked oak by deepening the warm undertones. Neutral white (3500K–4000K) works better with black oak or darker walnut finishes, where you want contrast rather than warmth. Common mistake: using daylight-temperature bulbs (5000K+) near wood veneer — it washes out grain detail and makes the panel look artificial.
3. Route wiring before the batten grid goes up
If you're running LED strips behind the panels, cut or drill your wire path through the batten grid before mounting any slats. Leave 300mm of slack cable at each connection point so you're not forcing tight bends later.
For a typical accent wall of 3 to 4 meters wide, plan for one power feed point and, ideally, one mid-wall junction so you're not running a single unbroken strip the full length. Common mistake: running one continuous LED run without a mid-point connector — a failure anywhere along the strip means pulling the whole thing.
4. Build in a lighting channel, not an afterthought gap
A proper lighting channel is a dedicated recess, not just leftover space. For LED strips, a 12mm to 15mm deep channel behind the top or bottom edge of the panel run hides the strip and the aluminum profile it usually sits in.
Many installers now route this channel directly into the furring strip layout rather than notching the panel itself, which keeps the warranty on the panel face intact. Detailed channel routing methods for slat installs are covered in how to add lighting channels to slat wall panel installations, which walks through the batten notching in more depth than fits here.
5. Test the strip before final panel mounting
Power the LED strip on the open batten grid before a single panel is screwed into place. Check for dead spots, color consistency across the run, and dimmer flicker at low brightness settings.
This is the point where problems are still a five-minute fix instead of a full teardown. Common mistake: skipping the test because the wall looks ready — connector failures often only show up once the strip is under load for more than a few minutes.
6. Mount panels working outward from the light source
Start panel installation at the section closest to your primary light feed and work outward. This keeps your reference point for slat alignment consistent and reduces the chance of a visible seam landing right where a light channel exits the wall.
For mixed lighting setups — LED strip plus a wall sconce or picture light — how to use acoustic panels with LED strip lighting covers sequencing when you're combining fixture types on one wall.
7. Set the dimmer curve after the panels are up
Once mounted, slat panels change how light scatters compared to the open batten grid you tested against. Recalibrate your dimmer curve with panels in place — what read as 40% brightness on bare battens often looks closer to 60% once slats are diffusing and shadowing the light.
Do this walkthrough at night with ambient room lights off, since daylight will mask uneven spots you'll notice later.
Troubleshooting
- Visible hot spots along the strip: Usually means the LED strip is too close to the panel back. Add 5mm to 10mm of standoff space or switch to a diffused-lens strip.
- Shadow lines running across slats: The light source is too direct and too close to the wall face. Move the fixture back or switch to indirect/behind-panel lighting instead of front-facing spots.
- Color looks different at the top vs. bottom of the wall: Check for two different LED strip batches — color temperature can drift between manufacturing runs even at the same rated Kelvin.
- Flickering at low dimmer settings: The driver isn't rated for the dimming curve you're using. Match the driver spec to the dimmer brand, not just the wattage.
- Gaps of light bleeding between slats: Normal on wider slat spacing (25mm+) with a bright behind-panel strip. Either reduce brightness or add a diffuser layer between the strip and the slat gap.
- Panel warping near the light channel: Usually a heat issue from an undersized driver running too hot behind wood veneer. Confirm the LED strip and driver are rated for enclosed or semi-enclosed mounting.
Tools and resources
- Laser level for long, straight lighting channel lines
- Low-voltage wiring kit rated for your total strip length
- A physical panel sample to test color temperature against your actual veneer before committing — the full sample box slat wall panel is built for exactly this kind of on-site light test
- Dimmer compatible with your driver's dimming curve
- A notebook sketch or CAD layout showing slat spacing, batten positions, and wire runs together
What to do next
Once the lighting plan is set, the next decision is slat orientation, since horizontal and vertical runs interact with light very differently — horizontal slats catch overhead light along their top edge, vertical slats catch side light along the length of the run. That comparison, along with how each orientation handles a lighting channel, is broken down in a separate guide on the site.
FAQ
What's the best color temperature for lighting a wood slat wall panel? Warm white in the 2700K to 3000K range works best against oak, walnut, and smoked oak veneers in 2026-era LED strip products, since it deepens the wood's natural warmth instead of flattening it.
Is LED strip lighting better than spotlights for slat wall panels? LED strips generally look better on slat walls because they diffuse evenly across the gaps between slats, while spotlights create harder shadow lines that emphasize every seam. Spotlights still work well as a secondary accent, not the primary source.
How much space do I need behind a slat panel for LED lighting? Plan for at least 15mm of gap behind the panel for even LED diffusion, and closer to 8mm to 10mm if the strip sits under a shelf-style edge rather than a full behind-panel run.
Can I add lighting to a slat wall panel after it's already installed? It's possible but harder — you'll likely need to remove sections of panel to access the batten grid and run new wiring, which is why planning lighting before installation saves time and materials.
Do I need an electrician to install LED lighting behind slat panels? Low-voltage LED strip runs on a plug-in driver typically don't require an electrician, but any hardwired transformer or new circuit tied into household wiring should go through a licensed electrician.
What wattage LED strip do I need for a slat accent wall? Coverage varies by strip density and desired brightness, so check the specific product's wattage-per-meter rating and multiply by your total run length rather than guessing a flat number.
Does slat spacing affect how lighting looks on the wall? Yes — wider gaps (25mm or more) let more behind-panel light bleed through, which can look great as a soft glow effect or look uneven if the strip isn't diffused properly.
Will lighting behind slat panels damage the wood veneer over time? Standard LED strips run cool enough for wood veneer as long as the driver isn't undersized and the panel isn't in a fully sealed, unventilated cavity — heat buildup from an overworked driver is the actual risk, not the light itself.
One last thing
The detail that trips up most first-time installers isn't the lighting hardware — it's forgetting to leave slack cable at connection points. Five to ten centimeters of slack at each junction turns a future repair into a two-minute job instead of a wall teardown, and it costs nothing to plan for on day one.



 Better performance and aesthetic appeal
 In Stock




