


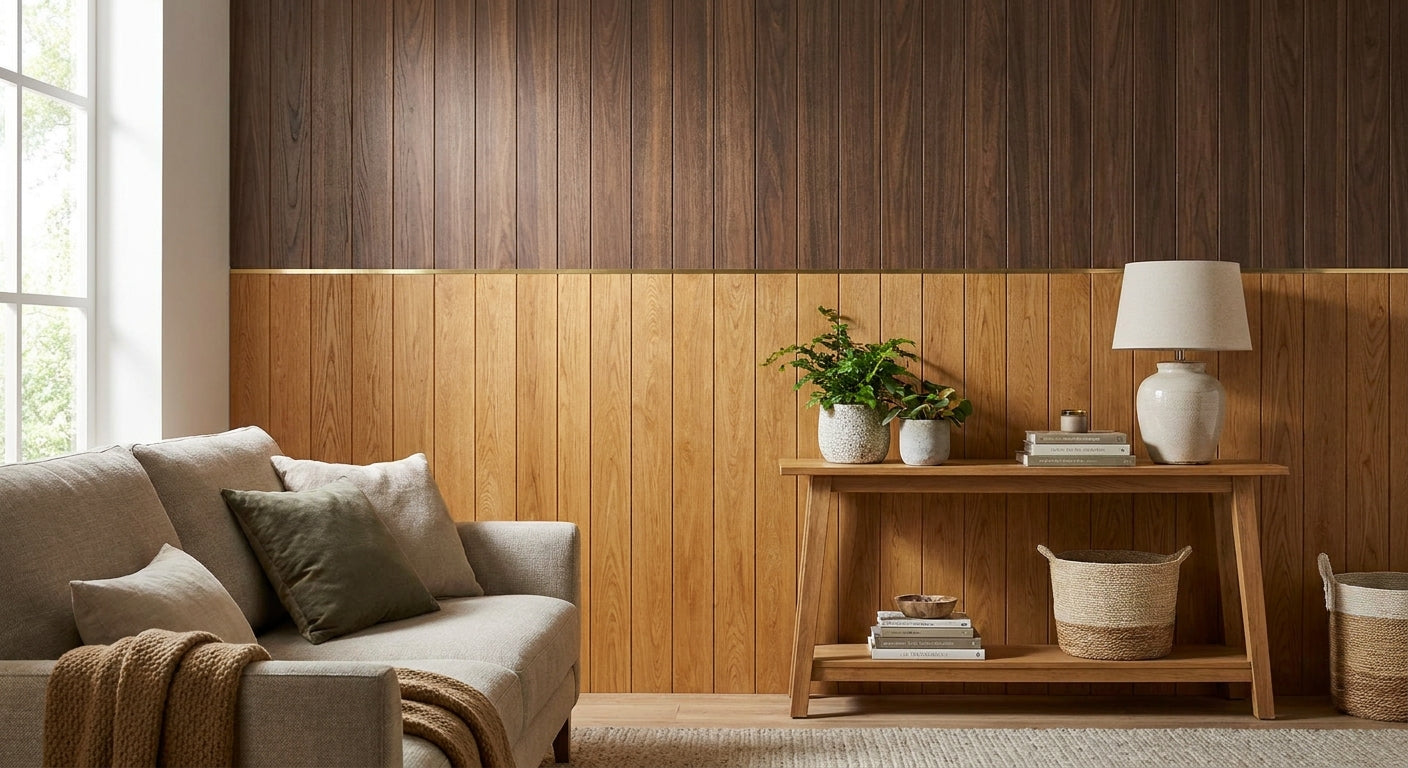
Two-tone wall design is the fastest way to make a slat panel installation look intentional instead of accidental, and it takes one extra material list and a chalk line to pull off correctly.
TL;DR: A two-tone wood panel feature wall pairs two contrasting slat finishes — usually a light oak with a dark oak or walnut — split by a horizontal line, a vertical break, or a geometric block. Natural oak against black oak gives the highest contrast and reads well in living rooms and bedrooms; smoked oak against natural oak is the softer, more forgiving combo for beginners. Budget 6-10 hours for a 12-foot wall, plan your split line before you cut anything, and expect to buy roughly 10% extra panel per color. Verdict: worth doing if you're comfortable with a miter saw — skip it if this is your first ever panel job.
Why this matters
A single-tone slat wall is a solid look, but it flattens out on camera and in real light because there's no visual anchor. Two-tone breaks that up: your eye catches the transition line, then reads the whole wall as a composition instead of a texture.
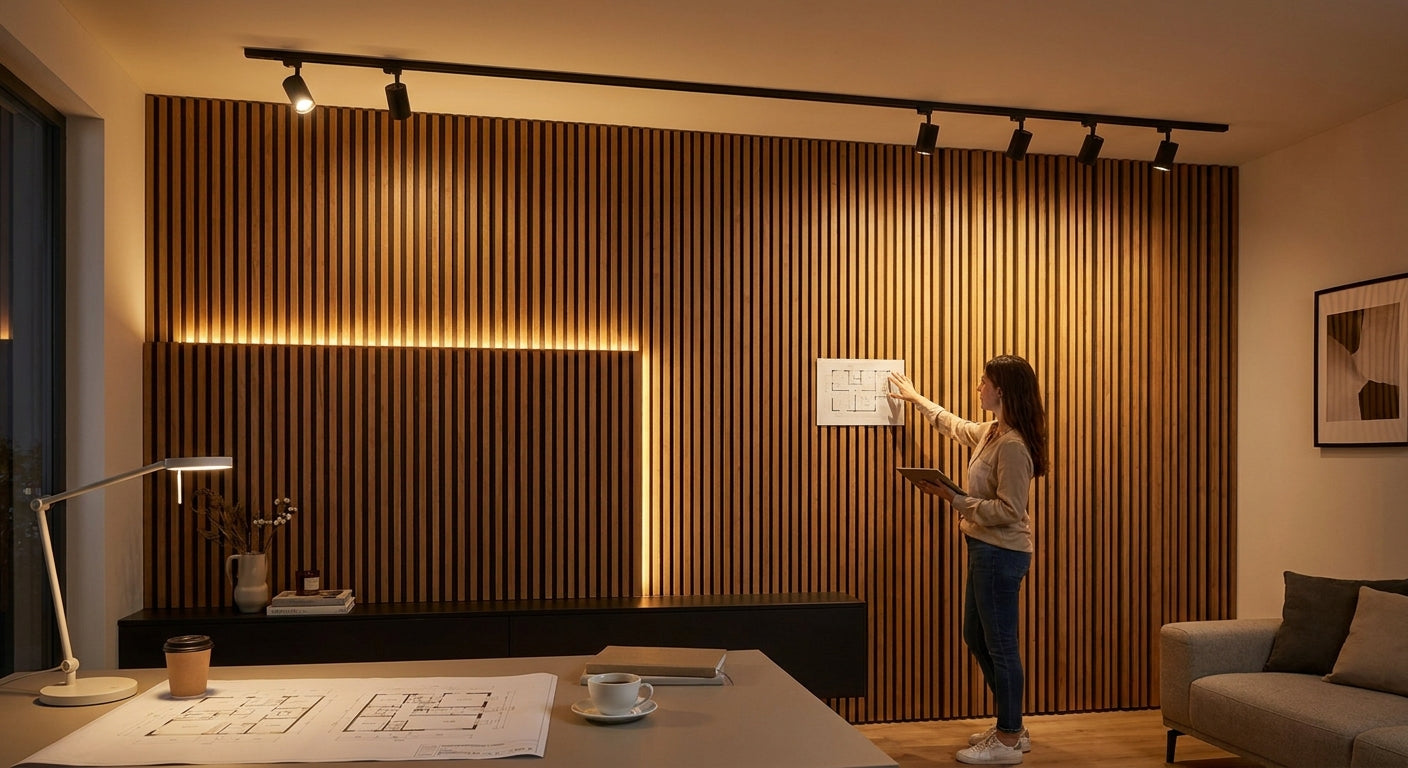
It also solves a practical problem. If you're covering a wall with a window, a fireplace, or a TV mount, a single continuous finish makes those obstacles look like interruptions. Split the tones around them and the obstacles become part of the design instead of a flaw in it. Natural oak slat panels paired with a darker finish also do double duty as acoustic treatment if the felt-backed versions go behind the panel face, so the wall isn't just decorative.
What you'll need
- Two contrasting slat panel finishes (light + dark, or light + mid-tone)
- Chalk line or laser level
- Miter saw or fine-tooth handsaw
- Tape measure and pencil
- Construction adhesive or panel-specific mounting clips
- Level (4-foot minimum)
- Stud finder
- Caulk gun
- End pieces or trim in the darker finish to close out clean edges
- Painter's tape to mark your split line before committing
Budget panel coverage at roughly 10% over your measured square footage per color — cuts around outlets, corners, and trim waste more panel than people expect.
The steps
1. Measure the wall and decide your split ratio
The classic two-tone ratio is 60/40 or 70/30 — one tone dominant, the other as an accent block. A dead 50/50 split can look like two separate projects stapled together rather than one design.
Measure total wall height and width in inches, then mark where the split line falls based on your ratio. For an 8-foot wall, a 70/30 split puts the break at roughly 67 inches from the floor if you're running the accent tone as the lower band — a common choice because it protects the darker, harder-to-touch-up finish from furniture scuffs.
Common mistake: measuring once and cutting the whole first batch of panels before checking the wall for square. Walls are rarely perfectly plumb — check both top corners before you commit to a single height.
2. Mark the split line with a laser level, not a tape measure alone
A laser level projects a continuous line across the full wall width in seconds and removes the guesswork a tape-measure-and-pencil approach introduces over a 10-12 foot run.
Tape the line with painter's tape first and step back 8-10 feet to eyeball it before you install anything. This is the single easiest place to catch an error — once panels are glued, the split line is permanent.
3. Dry-fit both tones before adhesive goes anywhere
Lay out full rows of both finishes on the floor or lean them against the wall in the pattern you're planning. This catches color-matching problems (batch-to-batch veneer variation is normal in real wood) before it's a permanent mistake on the wall.
Rotate panels from different boxes into the mix rather than installing box-by-box — natural veneer color varies slightly between production runs, and blending prevents visible zones of slightly different tone.
4. Install the lower or primary tone first, working bottom to top
Start at the baseboard and work upward, checking level every second or third row with your 4-foot level. Most slat panels click or interlock edge to edge, so the biggest risk here is starting slightly out of level and having the drift compound by row six.
Stop one row short of your marked split line so you have room to trim the final row to an exact fit rather than guessing.
5. Cut the transition row for a clean, tight seam
This is where the wall either looks professional or looks like a patch job. Measure the exact remaining gap to your split line, then rip that final row of the first tone down to size with the miter saw — never eyeball this cut.
A tight, straight seam between tones reads as intentional. A wavy or gapped seam reads as a mistake, even if the rest of the wall is flawless.
6. Install the contrasting tone above (or beside) the line
Switch to your second finish — black oak slat panels against natural oak is the highest-contrast combination and the one most requested for living room and TV feature walls in 2026 design projects. Work the same bottom-to-top or side-to-side method, checking level continuously.
Keep adhesive bead consistent between both tones — uneven glue lines behind different-colored panels can cause slightly different reveal depths that catch light differently and draw the eye to the seam for the wrong reason.
7. Finish the seam and edges with matched trim
A raw cut edge at the transition line looks unfinished no matter how straight the cut is. Close it out with black oak end pieces or the equivalent trim in your darker tone — trim in the dark finish reads cleaner against a light-to-dark transition than trim in the light finish does.
Run trim along outside corners and the top of the wall too if you're stopping short of the ceiling, which keeps the whole installation looking finished rather than mid-project.
8. Step back and check the wall from seating distance, not up close
Most two-tone problems are only visible from 3 feet away and disappear from 8 feet — and the reverse is also true. Sit where you'll actually view the wall daily before deciding it's done.
Troubleshooting
The seam line looks wavy even though I measured carefully. Check the wall for out-of-plumb studs — a wall that's off by even a half-inch over 10 feet will make a perfectly measured line look crooked. Re-mark with a laser level referencing the floor, not the previous panel row.
The two finishes look like different colors than they did on the sample. Lighting temperature changes wood tone perception dramatically — a warm bulb pulls oak toward orange, a cool LED pulls it gray. View both finishes under the room's actual lighting before finalizing the pairing, not under store or daylight conditions.
There's a visible gap at the transition seam. This is almost always a cut that's a few millimeters short. Re-cut a filler strip from scrap rather than trying to caulk-fill a wood seam — caulk reads as a mistake on a wood-grain surface.
One tone looks noticeably darker in different spots. Veneer color varies batch to batch. Pull panels from multiple boxes and blend them across the wall rather than installing box-by-box in sequence.
The dark tone shows dust and fingerprints more than the light tone. This is normal — darker finishes show surface contact more readily. Wipe with a dry microfiber cloth; avoid wet cleaning on real wood veneer.
The wall feels busy instead of intentional. Drop to a lower-contrast pairing — smoked oak with natural oak reads calmer than black oak with natural oak — or reduce the accent block to a single narrow band instead of a large section.
Tools and resources
- Miter saw for clean, repeatable cuts across both finishes
- Laser level for the split line — non-negotiable on runs over 8 feet
- Construction adhesive rated for interior wood veneer
- A full sample box if you're undecided between finishes — ordering swatches under your actual room lighting avoids the color-mismatch problem above
- End pieces or corner trim matched to your accent tone for a finished seam
AKU Woodpanel stocks both finishes used in this guide as full acoustic slat panels and as sample sizes, so you can test the pairing on the actual wall before ordering full coverage.
What to do next
Once the two-tone wall is up, the next decision most people face is how far to extend the contrast — just one wall, or carry the darker tone into an adjoining alcove or hallway. How to combine wood panel colors in one interior space covers pairing logic beyond a single wall, including which finishes clash and which read as a cohesive palette across multiple rooms.
FAQ
What's the best color combination for a two-tone wood panel feature wall? Natural oak paired with black oak gives the sharpest contrast and works well as a TV or living room feature wall in 2026 interiors. Smoked oak with natural oak is a softer, lower-contrast pairing that's more forgiving for a first installation.
Is a two-tone wall harder to install than a single-tone wall? Yes, moderately — the extra step is planning and cutting a clean transition seam, which single-tone walls don't require. Budget an extra 1-2 hours over a comparable single-tone install for measuring and trimming the split line.
Should the split line be horizontal or vertical? Horizontal splits suit wide walls and work well behind headboards or media units; vertical splits suit narrow walls, hallways, or as a frame around a doorway. There's no single correct answer — it depends on the wall's proportions.
How much extra panel should I buy for a two-tone design? Plan for roughly 10% over your measured square footage per finish to cover cuts, corners, and trim waste — buying tight on a two-tone job risks a color-batch mismatch if you need to reorder mid-project.
Can I do a two-tone wall with acoustic slat panels, not just decorative ones? Yes — felt-backed acoustic slat panels come in the same finish range as decorative panels, so the acoustic performance doesn't limit your color pairing options.
Does a two-tone wall cost more than a single-tone wall? You're buying two finishes instead of one, but total panel quantity doesn't change — cost difference comes mostly from slightly higher waste on the transition row cuts.
What ratio looks best for two tones on a wall? A 70/30 or 60/40 split reads as intentional; a 50/50 split often looks like two unrelated sections. Pick a dominant tone and treat the second as the accent.
Will the two finishes fade at different rates? Real wood veneer finishes darken slightly with UV exposure over time regardless of tone, but darker finishes show less visible change than very light ones — check panel placement relative to direct sunlight before finalizing your pairing.
One last thing
The transition row — the one you cut to fit exactly at the split line — is the row that makes or breaks the whole wall, and it's also the row most people rush because it feels like the last piece instead of the centerpiece. Measure it twice, cut it once, and the rest of the wall reads as professional even if earlier rows had small adjustments.



 Better performance and aesthetic appeal
 In Stock




