


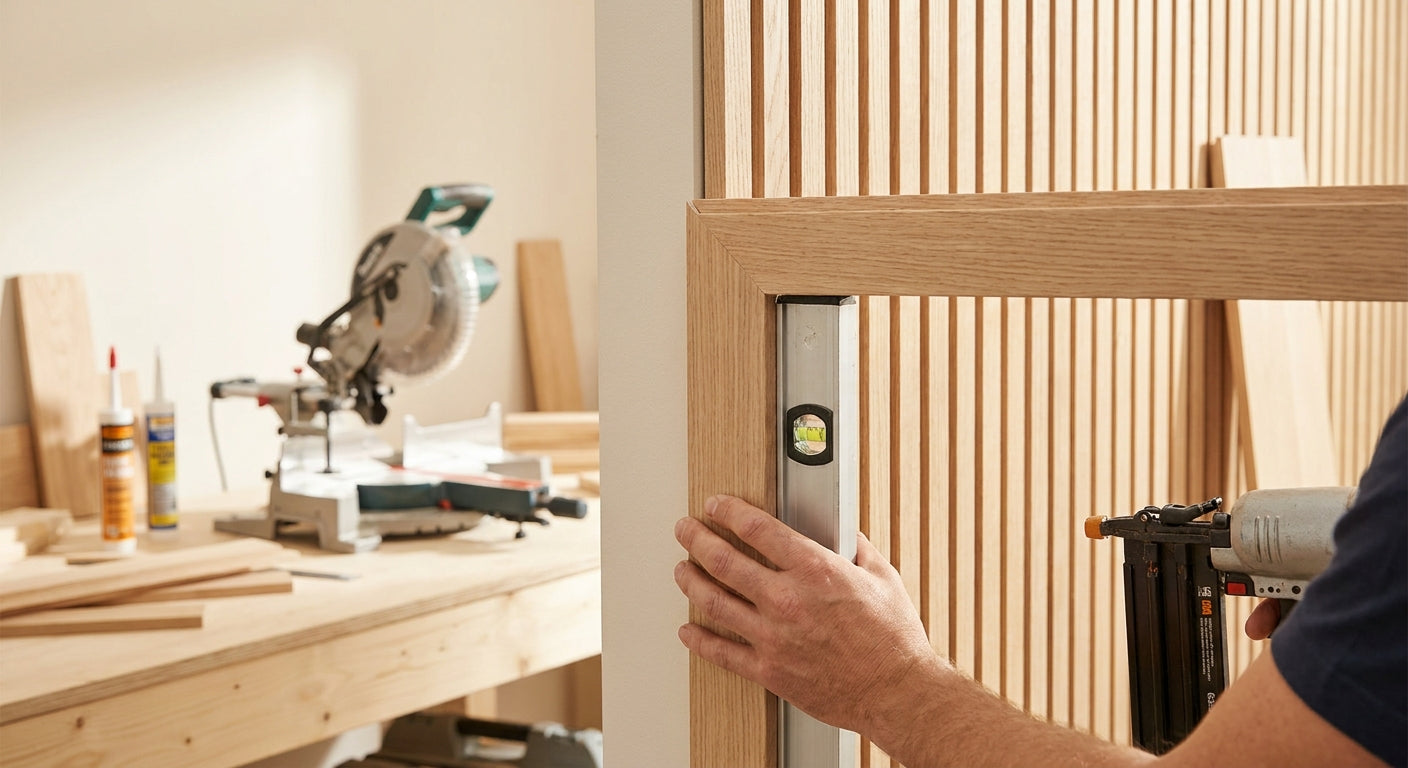
Framing a wood slat panel installation with trim is what separates a DIY wall that looks store-bought from one with visible seams, raw MDF edges, and gaps where the drywall shows through.
TL;DR
Framing a wood slat panel installation with trim means adding corner trim, end pieces, and a clean reveal line at the ceiling and baseboard so no cut edge or backing material is exposed. In 2026, the fastest route for most homeowners is pairing AKU Woodpanel's natural oak slat wall panels with matching end-piece trim rather than improvising with standard paint-grade molding, which rarely matches veneer tone. Verdict: use manufacturer-matched end pieces and a 1/4-inch reveal gap — Buy. Skipping trim entirely on a full accent wall is a Skip.
Why this matters
A slat panel wall without proper trim looks unfinished even when the panels themselves are installed straight. The raw edge of an MDF or plywood backing catches light differently than the veneer face, and any gap wider than 1/8 inch at a corner reads as a mistake from across the room. Trim also protects the panel edge from chipping during vacuuming or furniture moves, which matters more with acoustic slat panels since the felt backing is softer than solid wood. In 2026, more homeowners are running slat panels floor-to-ceiling instead of as a strip accent, and that means more linear feet of trim exposed at outside corners, inside corners, and ceiling lines — get the framing wrong and it shows on every wall, not just one.
Good trim work does three things: it hides the panel's cut edge, it lets adjoining walls meet at a clean line instead of a butt joint, and it gives the installation room to expand and contract with humidity without cracking. Wood veneer panels, including natural oak slat wall panels, move seasonally the same way solid hardwood floors do. Trim that's fastened too tight defeats that movement allowance and causes buckling by year two.
What you'll need
- Miter saw or a miter box with a fine-tooth blade (24+ TPI for veneer-faced trim)
- Tape measure and a 4-foot level
- Stud finder
- Construction adhesive rated for wood veneer, plus a caulk gun
- 18-gauge brad nailer and 1-1/4 inch brads
- Matching end pieces for the panel run you're framing
- Wood filler or color-matched putty stick
- Fine-grit sandpaper (220 grit) and a tack cloth
- Paintable caulk for ceiling and baseboard transitions
- Safety glasses and a dust mask for cutting
The steps
1. Measure and mark your reveal line
Snap a level chalk line 1/4 inch in from where the panel edge meets the corner or ceiling. This reveal is what keeps trim from binding against the panel during humidity swings. Skipping this step is the single biggest cause of buckled trim in year-two callbacks — a tight, glue-locked joint has nowhere to move.
2. Dry-fit every trim piece before cutting final angles
Cut one piece at 45 degrees, hold it in place, and check the gap at the joint with a business card. If the card doesn't slide through evenly, adjust the miter by a degree or two rather than forcing the joint closed with clamps. A forced joint looks fine on install day and opens up a hairline crack by month three.
3. Cut outside corners at 45-degree miters, inside corners at coped joints
Outside corners (where the wall projects into the room) take standard mitered 45-degree cuts. Inside corners (where two walls meet in a notch) hold tighter over time with a coped cut instead of a miter, because drywall corners are rarely a true 90 degrees. This distinction is covered step-by-step in the corner trim installation guide, and it's worth reading before you make your first cut if this is your first slat wall.
4. Attach trim with adhesive first, brads second
Run a bead of construction adhesive down the back of the trim, press into place, then set two brads per foot to hold it while the adhesive cures — typically 24 hours for a full bond. The brads are backup, not the primary hold; adhesive-only installs sag over time on vertical runs longer than 6 feet.
5. Fill nail holes and seam gaps the same day
Use a color-matched putty stick on veneer trim rather than standard wood filler, which dries lighter than most oak and walnut finishes. Press filler into the hole, wipe flush immediately, and let it set before any sanding — sanding wet filler smears it into the grain and leaves a visible halo.
6. Sand at 220 grit and check the reveal line again
Light sanding removes any adhesive squeeze-out without cutting through the veneer's thin face layer, which on most engineered slat panels runs under 1mm thick. Check your reveal gap one more time here — humidity from the adhesive curing can shift it slightly.
7. Install end caps at every panel termination
Any point where a slat panel run stops short of a wall, window, or another material needs an end piece, not a raw cut edge. Terminations without end caps are the most common warranty issue reported on DIY installs, because the exposed MDF core absorbs moisture faster than the veneer face. Full technique is in the guide to using end pieces if you're framing more than one termination point.
8. Caulk the ceiling and baseboard transitions last
A thin, paintable caulk bead at the top and bottom of the panel run closes the shadow gap without eliminating the expansion reveal. Tool it smooth with a wet finger immediately — cured caulk on veneer is difficult to remove without damaging the finish.
Troubleshooting
Miter joints open up after a few weeks. The reveal gap was likely too tight or the adhesive didn't fully cure before brads were set. Re-glue with a slightly wider joint and clamp for the full 24-hour cure this time.
Trim sits proud of the panel face. Usually means the panel backing and trim thickness don't match. Check that your end pieces are rated for the same panel profile before cutting — mixing panel lines is the top cause of this in 2026 installs.
Color mismatch between trim and panel veneer. Natural wood veneer varies by batch, so order trim and panels from the same run when possible, and test stain matching on an offcut before finishing the whole wall.
Panel edges chip during cutting. Score the veneer face with a utility knife before running the miter saw — this prevents tear-out on the visible edge, especially on smoked oak and black oak finishes where chipping shows white core underneath.
Trim won't sit flush at an inside corner. Drywall corners are rarely square. Cope the joint instead of mitering it, following the corner technique referenced in step 3.
Gap appears at the ceiling line after a season. This is normal seasonal movement, not a failed install. A 1/8 to 1/4 inch reveal is built to absorb exactly this — recaulk if the gap exceeds a quarter inch.
Tools and resources
- Matching end pieces sized to your panel run: end piece slat wall panel
- A miter saw with a fine-tooth blade, not a standard framing blade
- Color-matched putty sticks rather than generic wood filler
- The corner trim and end piece guides referenced in the steps above cover joint types most DIY tutorials skip entirely
What to do next
Once the trim framing is set, the next failure point on most installs is panel spacing and layout planning before the first cut is ever made. If you haven't finalized your panel count and layout yet, work that out before you buy trim — trim length depends entirely on final panel positions, not the other way around.
FAQ
What's the best trim for framing a wood slat panel wall? End pieces manufactured to match your specific panel line give the cleanest result because the veneer tone and profile depth are already aligned — generic paint-grade molding almost never matches engineered wood veneer exactly.
Is coping better than mitering for slat panel trim? For inside corners, yes — coped joints hold tighter over time because they account for walls that aren't a true 90 degrees, which is common in older homes and new drywall alike.
How much does it cost to frame a slat panel wall with trim? Costs scale with linear footage of trim needed, which depends on your panel layout, number of corners, and whether you're running floor-to-ceiling or a partial accent strip.
Do I need adhesive and brads, or just one? Use both — adhesive carries the long-term hold, brads hold the trim in place during the 24-hour cure so it doesn't shift before the bond sets.
How wide should the reveal gap be? A 1/4 inch reveal at corners and ceiling lines gives the panel room to expand seasonally without buckling the trim against it.
Can I skip end caps if the panel run ends at a corner? No — any exposed panel edge, even one tucked into a corner, absorbs moisture faster without an end cap and is the most common warranty complaint on unfinished DIY installs.
What causes trim to look proud of the panel surface? Mismatched trim and panel thickness, usually from mixing product lines. Confirm your end pieces are rated for your exact panel profile before cutting.
Will the trim color match perfectly with the panel veneer? Natural wood veneer has batch variation, so ordering trim and panels together and test-fitting an offcut before finishing the wall avoids visible mismatch.
One last thing
Most DIY slat wall failures in 2026 don't come from bad panel installation — they come from trim fastened too tight against the reveal line, leaving the veneer no room to move with the seasons. Leave the quarter-inch gap even when it looks slightly loose on install day; it's doing its job.




 Better performance and aesthetic appeal
 In Stock




