


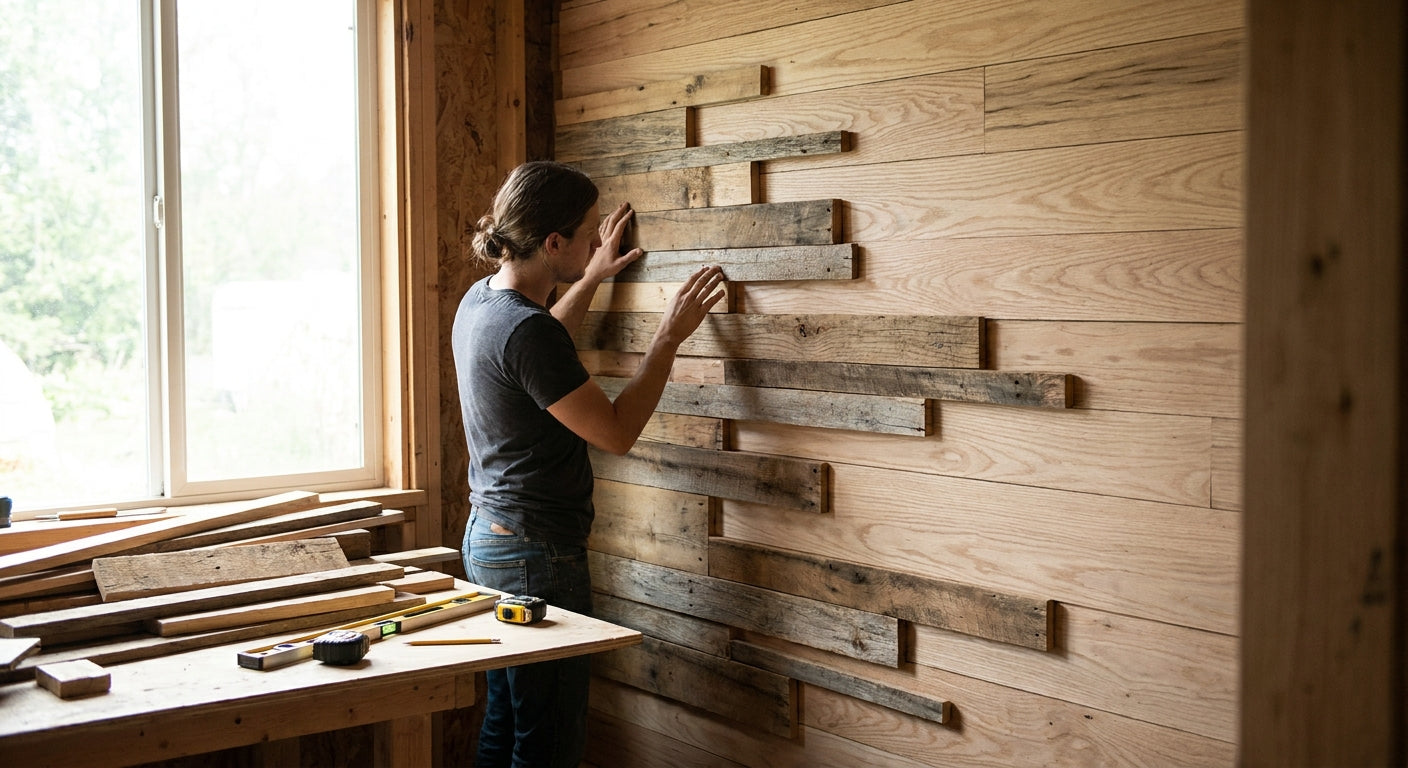
Leftover slat, fluted, and hexagon offcuts pile up fast on any wood panel install — this guide turns that scrap pile into a second feature wall instead of a dumpster run in 2026.
- Building a wood panel wall from offcuts cuts material cost 15-30% versus a full-panel order in 2026.
- Sort offcuts by species and width first — pieces under 4 inches work best as a hexagon mosaic.
- Akuwood Panel end pieces finish raw offcut edges instead of leaving exposed MDF core to swell.
- Skip warped or water-stained offcuts on acoustic walls — they kill NRC performance and adhesion both.
Why this matters
A typical slat or fluted panel install leaves 10-20% of material as offcuts once you've trimmed around outlets, corners, and window returns. Most of that gets thrown out. A wood panel wall from offcuts salvages that scrap into a legitimate second feature — a hallway strip, a closet interior, or a small accent behind a headboard — without a new material order.
The math works because Akuwood Panel panels are sold with a consistent veneer and core thickness across the natural oak, walnut, black oak, and smoked oak lines, so offcuts from different boxes still match in profile even when the finish differs slightly. That consistency is what makes a scrap wall look planned instead of patched.
What you'll need
- Saved offcuts from a prior slat, fluted, or hexagon install — plan on 12-15 pieces averaging 6 inches long for a 4x6 foot wall section
- Tape measure, pencil, and painter's tape for layout marking
- A miter saw or fine-tooth handsaw for squaring irregular cuts
- Construction adhesive rated for MDF-to-drywall or MDF-to-plywood bonds
- A level and a stud finder
- Trim pieces to close off exposed offcut edges
- 2-3 hours of working time for a small section, plus 24-48 hours of adhesive cure time
The steps
1. Inventory and sort your offcuts
Spread every scrap out and sort by species — natural oak, walnut, black oak, smoked oak — then by width. This tells you upfront whether you have enough for a single continuous run or need to plan a mixed-width pattern. Don't toss anything under 3 inches; those short pieces are exactly what a hexagon mosaic needs later. Mistake to avoid: sorting by length alone and ignoring veneer tone, which produces a wall that looks accidental rather than designed.
2. Sketch the layout to scale
Draw the wall on grid paper at 1 inch to 1 foot and mark stud lines before you touch a single piece. This step catches problems — like a run that's 3 inches short of the ceiling — while they're still cheap to fix. Mistake to avoid: skipping the sketch and eyeballing placement directly on the wall, which usually ends in a lopsided pattern you notice only after the adhesive sets.
3. Dry-fit before you commit
Tape the offcuts to the wall with painter's tape and live with the layout for 24 hours. Check it under morning light and lamp light — veneer tone shifts more than people expect between the two. Mistake to avoid: gluing on day one. A dry-fit costs you nothing and catches spacing errors adhesive won't forgive.
4. Standardize the odd pieces to one module
Run your irregular offcuts through the miter saw at a square 90-degree cut and standardize them to one repeatable width — 4 inches is a common target for slat offcuts. A consistent module reads as intentional even when the pieces started as scrap. Mistake to avoid: cutting from the veneer face down, which splinters the surface layer; always cut face-up.
5. Turn the smallest scraps into a hexagon mosaic
Anything under 4 inches is too short for a slat run but perfect as a hexagon accent. Use a hexagon acoustic panel as a spacing template so your offcut hexagons align with a true hexagon grid — 32-inch panel modules keep the geometry honest even when you're filling gaps with scrap. Mistake to avoid: free-handing hexagon angles with a miter saw set to a rough guess; a 2-degree error compounds fast across a wall.


6. Finish every exposed edge
Offcuts almost always have at least one raw, unfinished edge where the original panel was cut. Close it off with an end piece slat wall panel instead of leaving MDF core exposed — raw edges absorb ambient moisture and can swell visibly within 6-12 months in a bathroom or kitchen adjacent space. Mistake to avoid: caulking over a raw edge as a shortcut; caulk doesn't match the veneer grain and it shows within a season.
7. Install, seal, and step back
Apply adhesive in a zigzag bead, press each piece for 30 seconds, and let the section cure for 24-48 hours before touching it. Check seam gaps with a straight edge — anything wider than 1/8 inch needs a shim or a re-cut. Mistake to avoid: loading the whole wall in one session; work in 4-foot sections so the adhesive doesn't skin over before you've placed the piece.
Troubleshooting
Offcuts don't match in tone. Natural oak from one box run can read slightly lighter than another six months later because veneer is a natural material. Group the mismatched pieces at the bottom of the wall or behind furniture where the eye lands last.
Gaps wider than 1/8 inch at seams. This usually means the wall behind isn't flat. Shim behind the offcut with thin plywood strips before gluing rather than forcing the piece tight, which stresses the veneer.
Not enough offcuts to cover the planned area. Don't stretch thin scrap to fill a large wall — order one or two full panels to backfill instead of spacing offcuts too far apart, which breaks the visual rhythm the whole point of a slat pattern depends on.
The wall doesn't cut echo the way a full acoustic install does. Offcuts without felt backing behave more like decorative cladding than acoustic treatment. If sound absorption is the goal, keep felt-backed offcuts together and read up on how to finish slat wall panel edges properly so the felt layer isn't compromised at the cut line.
Adhesive won't hold on an uneven substrate. Skim-coat high spots or add furring strips before you glue. Adhesive failure on offcut walls traces back to substrate flatness more often than to the adhesive itself.
Tools and resources
- Miter saw with a fine-tooth blade (40+ teeth) for clean veneer cuts
- Painter's tape for the 24-hour dry-fit
- Construction adhesive rated for interior MDF panels
- A stud finder and 4-foot level
- End piece trim for finishing raw edges cleanly
- Sample pieces if you're color-matching an offcut batch against a new order
What to do next
Once the offcut section is up, the next question is usually whether to mix panel widths on the rest of the wall to stretch remaining scrap further, or to standardize on one width for a cleaner look. That decision changes your cut list, so plan it before you order any backfill panels.
FAQ
Can you really build a full wood panel wall from offcuts?
Yes, for small sections up to about 6x8 feet, offcuts from prior slat, fluted, or hexagon installs cover the space fine. For larger walls in 2026, plan to backfill with one or two new panels since offcuts alone rarely cover more than that without visible gaps.
How many offcuts do I need for a 4x6 foot wall?
Plan on 12-15 offcuts averaging 6 inches long to cover a 4x6 foot section. Shorter scraps under 4 inches work better repurposed into a hexagon mosaic than stretched into a slat run.
Do offcuts match the color of new panels?
Natural wood veneer varies slightly between production runs, so offcuts saved from an older install may read a shade lighter or darker than a fresh order. Group mismatched tones toward the bottom of the wall where the eye lands last.
Is a wood panel wall from offcuts as good acoustically as a full install?
Only if the offcuts still have their felt backing intact. Cutting through felt-backed panels without resealing the edge reduces sound absorption at that seam, so keep felt-backed pieces together and finish the cut edges properly.
What's the cheapest way to finish raw offcut edges?
End piece trim closes off exposed MDF core cleanly and costs far less than replacing a swollen panel later. Caulk is not a substitute since it doesn't match the veneer grain and shows within a season.
Can offcuts from different panel lines be mixed on one wall?
Yes, as long as the core thickness matches. Mixing natural oak, walnut, and black oak offcuts on one wall works visually if you group by tone rather than scattering them randomly.
How long does an offcut wall take to install?
A 4x6 foot section takes 2-3 hours of working time plus 24-48 hours of adhesive cure before the wall can be touched or leaned on.
What's the biggest mistake people make with offcut walls?
Skipping the dry-fit. Gluing offcuts directly to the wall without a 24-hour test under different lighting is the single most common reason people redo an offcut project within the first month.
One last thing
The felt-backed hexagon offcuts nobody wants to keep are usually the most useful ones in the pile — a 3-inch scrap with intact felt still contributes to sound absorption in a small mosaic even though it looks too small to matter on its own. Save those before the veneer-matched full pieces; the full pieces are easy to reorder, the felt-backed scraps aren't.




 Better performance and aesthetic appeal
 In Stock




