


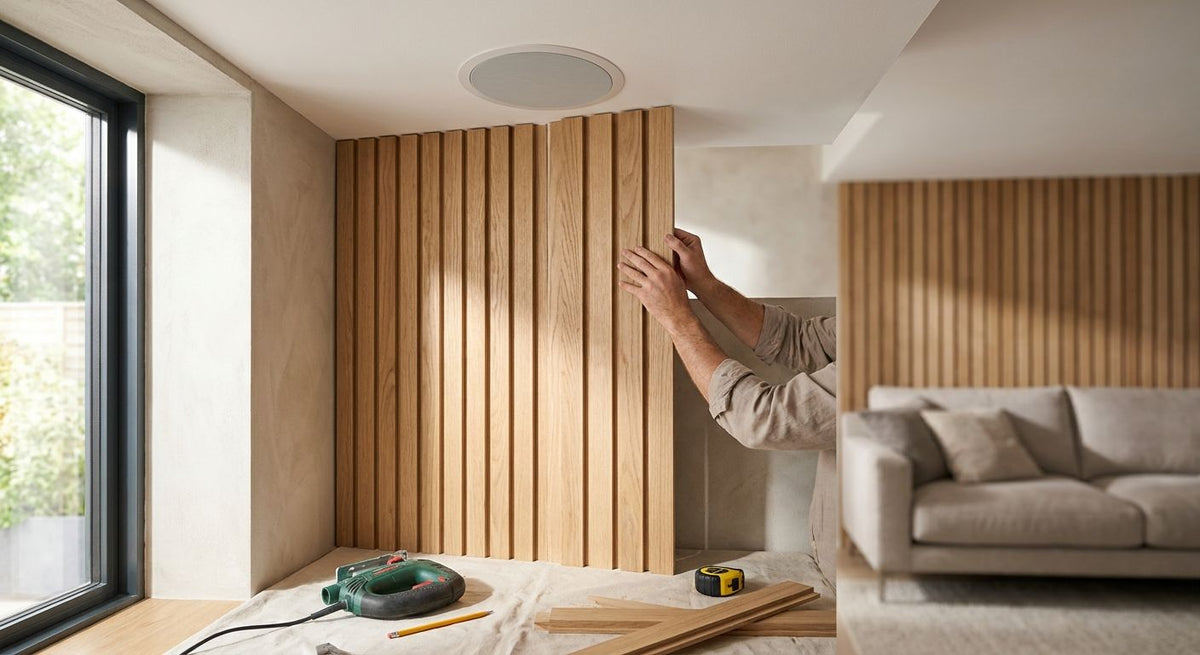
Cutting real wood wall panels around a built-in ceiling speaker in 2026 comes down to three things: tracing the speaker's trim ring onto the panel, cutting the hole from the back face with a hole saw or jigsaw, and dry-fitting the section before you commit adhesive or track fasteners. The method barely changes whether you're working with slat, fluted, or hexagon panels. The part most homeowners skip: leaving at least 1/4 inch of clearance around the cutout so the grille still pops off later for a bulb change or a wiring fix, instead of just fitting the panel snug against the speaker basket.
- How to install wood panels around ceiling speakers starts with tracing the trim ring onto the panel back.
- Cut the hole from the back face with a hole saw sized to the trim ring's diameter.
- Leave 1/4 inch of clearance around the cutout so the grille still pops off for maintenance.
- Slat panels like Akuwood Panel's Acoustic Slat Wall Panel let sound pass through to the speaker.
- Dry-fit every section before final fastening to catch cutout errors before they're permanent.
Why this matters
A ceiling speaker installed flush with drywall is forgiving — patch and repaint if the cutout drifts. Bring wood wall panels up to that same ceiling plane in 2026 and the cutout has to land exactly where the trim ring sits on the panel face, not just somewhere close. Miss the trace by half an inch and you're staring at a visible gap around the ring or a grille that won't seat flush.
The stakes go up with real wood veneer compared to drywall. A drywall patch costs nothing to redo; a panel section from Akuwood Panel with matched grain direction is not something you want to recut twice. Get the cutout right the first time and the panel reads like it was designed around the speaker from the start, not patched afterward.
How do you install wood wall panels around ceiling speakers?
The process is the same core sequence whether you're paneling a full ceiling feature or just the section around one recessed speaker. Work through it in order and don't skip the dry-fit.
- Locate and mark the speaker template. Before cutting a single panel, pull the trim ring or paper template that shipped with the ceiling speaker and trace its outer edge exactly where the panel section will land.
- Transfer the mark to the panel back. Flip the panel section over and copy the traced circle onto the backside, so no pencil or marker ever touches the visible veneer face.
- Cut from the back face. Score along the line first with a utility knife, then finish the cutout with a hole saw sized to the trim ring's outer diameter — commonly 6.5 to 8 inches for standard in-ceiling speaker housings — or a jigsaw for oval and rectangular housings.
- Dry-fit before fastening. Hold the cut panel section up to the ceiling and slide it around the speaker basket to confirm at least 1/4 inch of clearance on every side before it's permanent.
- Route the wiring. Feed the speaker leads through the panel's mounting channel or through the natural gaps between slats before final attachment, never across a visible face.
- Fasten and finish the edges. Mount the panel using standard adhesive or track hardware, then finish the raw cutout edge with trim or an end piece so no unfinished substrate shows.
Slat-style panels have a practical edge here over solid tile formats: the gaps between slats let sound continue to travel even where a panel section sits close to the speaker, so you're not fighting the acoustics of the room while you solve the fit problem. An Acoustic Slat Wall Panel in a finish like natural oak handles this without the veneer face showing any sign of the cutout once trim goes on.
Why the cutout process varies
No two ceiling speaker installs are identical, and the panel cutout method flexes with a few real variables:
- Speaker housing shape — round trim rings cut cleanly with a hole saw; square or rectangular housings need a jigsaw and a steadier hand.
- Retrofit vs. new-construction housings — retrofit speakers sit shallower and often have less clearance behind the panel for wiring loops.
- Panel type — slat panels let you hide a slightly imperfect cutout inside a shadow gap; solid tile or 3D panels show every millimeter of the cut edge.
- Ceiling substrate — drywall behind the panel gives more forgiveness for anchor placement than furring strips or exposed joists.
- Grille maintenance access — some speaker grilles pop out with finger pressure; others need a suction tool, which changes how much clearance you build in.


Related questions
Can you cut acoustic slat wall panels without splitting the veneer?
Yes — score the cut line with a utility knife before running the hole saw or jigsaw through the back face, which keeps the top veneer layer from splintering. Cutting from the front face first is the most common way to ruin a panel section around a speaker cutout.
Do you need a special blade to cut wood panels around ceiling fixtures?
A fine-tooth jigsaw blade or a carbide-edge hole saw handles most cutouts around ceiling speakers or recessed lights without chipping the veneer. A standard wood-cutting blade with a high tooth count reduces tear-out more than a coarse demolition blade.
How much clearance do you need around a ceiling speaker grille?
1/4 inch of clearance around the cutout is the minimum to keep the grille removable for filter changes or wiring repairs. Tighter than that and the grille can bind against the panel edge, especially once the wood veneer expands slightly with seasonal humidity.
FAQ
What's the best wood wall panel to use around a ceiling speaker?
An Acoustic Slat Wall Panel is the best choice around a ceiling speaker because the gaps between slats keep sound traveling clearly even close to the cutout. Solid tile-format panels work too but need a cleaner cut since every edge of the hole stays visible.
Is it better to cut the panel before or after mounting it?
Cut the panel before mounting, using a template traced from the speaker's trim ring on the back face. Cutting in place risks cutting into wiring or the speaker housing itself.
Can you install wood slat panels around recessed lighting the same way?
Yes, the same trace-and-cut method works for recessed lights, using a hole saw matched to the fixture's trim diameter instead of the speaker's. Recessed light housings often run shallower than speaker housings, so check clearance behind the panel before cutting.
Do ceiling speakers need extra support when panels are added?
No, ceiling speakers mount to their own bracket or housing independent of the panel, so the panel doesn't carry any of the speaker's weight. The panel only needs to clear the housing, not support it.
What tool cuts the cleanest hole in a wood veneer panel?
A hole saw with a carbide edge cuts the cleanest round hole in a wood veneer panel when the cut starts from the back face. For irregular or rectangular cutouts, a fine-tooth jigsaw blade is the better tool.
Is real wood veneer paneling safe near ceiling speakers and wiring?
Yes, real wood veneer paneling is safe near ceiling speakers and standard low-voltage speaker wiring as long as the wiring is routed through the panel's channel rather than pinched behind it. Keep any cut edges clear of exposed wire runs.
How do you match panel grain around a round cutout?
Match panel grain around a round cutout by cutting from a single panel section rather than piecing two together, so the grain direction stays continuous across the hole. Order an extra panel section if the cutout falls near a factory edge.
One last thing
The cutout is never the hard part — the dry-fit is. Most installation mistakes around ceiling speakers trace back to skipping that one step and finding out only after the adhesive sets that the trim ring sits a half inch off from where it needs to be. Trace twice, cut once from the back, and the panel section goes up looking like the speaker was never a problem to design around in 2026 or any year after.




 Better performance and aesthetic appeal
 In Stock




