


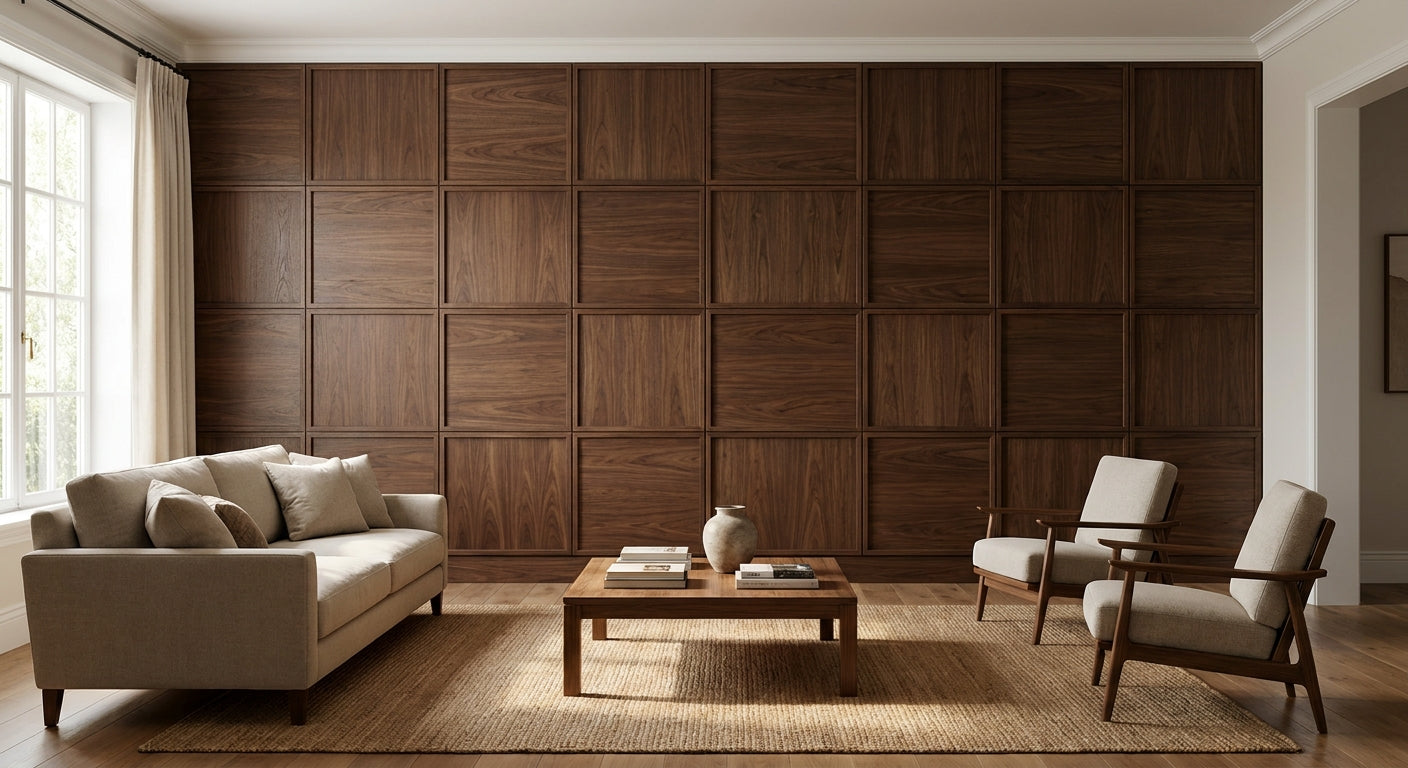
A panel grid layout turns a blank feature wall into a repeatable, symmetrical pattern instead of a random row of slats — and the difference between a grid that reads as intentional and one that looks crooked comes down to measuring, dry-laying, and installing from the center out, not the corner in.
- A panel grid layout feature wall starts at the center line, not the corner — Buy: dry-fit every row first.
- Hexagon acoustic panels ship 32 inches wide, 4 panels per box, sized for repeatable grid modules.
- Slat and hexagon panels carry an NRC of 0.75, so a grid pattern still cuts echo, not just looks good.
- End pieces close open edges cleanly — skipping them is the most common 2026 install mistake on large walls.
Why this matters
A feature wall that's 10 feet wide or taller than 8 feet stops reading as a single accent the moment you install panels edge-to-edge without a plan — your eye picks up every seam that doesn't line up. A grid layout fixes that by breaking the wall into a repeating module, so any small variance in the drywall or the panel batch gets absorbed by the pattern instead of standing out.
This matters more on large walls than small ones. A 4-foot accent wall forgives a half-inch of drift. A 14-foot feature wall in a living room or a commercial lobby does not — that drift compounds across every row, and by the far end of the wall you're off by two or three inches. Planning the grid before you touch adhesive or screws is what keeps a large wall looking like one continuous design instead of a patched-together job.
The format you pick changes the math, too. A tile acoustic slat wall panel ships 4 panels per box specifically for smaller, modular sections, which makes it easier to plan a repeatable grid than a single long slat panel meant to run wall-to-wall.
What you'll need
- Laser level or a 4-foot spirit level and chalk line
- Tape measure (25 ft minimum for large walls)
- Pencil and painter's tape for marking reference lines
- Panel adhesive or a compatible mounting rail system, plus a caulk gun
- Fine-tooth saw or oscillating multi-tool for trims
- Your chosen panel format — slat, hexagon, fluted, or tile — plus end pieces to close raw edges
- A helper for anything over 8 feet tall; grid layouts go crooked fast when one person tries to hold and level simultaneously
The steps
1. Measure the wall and set your grid module
Measure width and height in inches, then decide what one "module" of your grid equals — one hexagon panel, one tile section, or a set number of slats per row. This number becomes the repeating unit for the entire wall, so get it exact before you order material. A miscount here means reordering mid-project, which is the single biggest cause of installs stalling out in 2026.
Common mistake: measuring only the width and assuming height will "work itself out." It won't — mark both axes before ordering.
2. Choose your panel format and finish
Hexagon and tile-format panels are built for grid work because they arrive as discrete, repeatable units rather than one continuous run. If you want the honeycomb look specifically, hexagon panels at 32 inches wide give you a clean, countable module across a wide wall. If you want straight lines instead, a slat or fluted panel in a tile format does the same job with a linear grid.
Pick your finish now too — natural oak, walnut, black oak, or smoked oak all read differently at scale. A dark finish like black oak reads bolder and hides seams better on a large wall; a lighter natural oak shows more contrast, which some rooms want and others don't.
3. Dry-lay the panels before fixing anything
Lay every panel on the floor, or prop them against the wall in position, in the exact grid pattern you plan to install. This step gets skipped constantly because it feels slow, and it's the step that saves the most rework. You'll catch mismatched grain direction, an uneven module count, or a panel that needs trimming before it's permanently mounted.
Expected outcome: you should be able to stand back and see the full grid pattern before a single fastener goes in.
4. Mark your centerlines and reference lines
Find the horizontal and vertical center of the wall and mark it with a chalk line — this is your anchor point, not the corner. Grids installed from a corner drift as they cross the wall because corners are rarely perfectly square; centerlines don't have that problem.
Common mistake: trusting the baseboard or ceiling line as level. On older construction especially, neither one is guaranteed straight — check with a level, not by eye.
5. Install from the center out, not the corner in
Mount your first module on the centerline, then work outward symmetrically in both directions. This is what keeps a grid layout balanced on a wall that isn't perfectly square — any small gap or trim cut ends up at the outer edges, where it's least noticeable, instead of down the middle where every eye lands first.
Work one row or column at a time and re-check level every third module. Small errors compound across a large wall faster than they do on a small one.
6. Finish the edges and corners
Open panel edges at the end of a row look unfinished and catch dust and light differently than the veneer face. An end piece slat panel closes that raw edge with a matched finish, so the grid reads as complete rather than cut off mid-pattern. Corners and outside edges get the same treatment — don't leave MDF substrate visible anywhere the wall meets another surface.
7. Add lighting or trim last
If you're running LED strip lighting behind or between grid sections, install it after the panel grid is fixed and confirmed level, not before. Lighting installed early gets knocked out of alignment during panel adjustments, and you'll end up redoing electrical work you didn't need to touch twice. Check how to calculate how many wall panels you need before you finalize your order — running short mid-grid on a large wall means a delayed second shipment and a visible seam where finishes don't quite match.


Troubleshooting
- Seams don't line up at grid intersections — go back to your centerline mark. If the drift started at the corner, the wall is out of square; re-measure from center and shift the whole grid, not just the last row.
- Wall isn't perfectly square — this is normal in most builds, even ones finished in 2026. Center-out installation absorbs the error at the outer edges instead of the middle.
- Grid looks busy or overwhelming on a large wall — reduce contrast between panel and wall color, or switch to a single-tone finish like natural oak instead of mixing two finishes across the same grid.
- Gaps show drywall behind the panel — trim end pieces to match, and confirm your adhesive or mounting rail is rated for the panel weight; sagging panels open gaps over time.
- An outlet or switch falls mid-panel — mark electrical locations during the dry-lay step (step 3), not after panels are mounted. Cutting a fresh panel for an outlet you didn't plan for wastes material.
Tools and resources
- Laser level, chalk line, and a 25-foot tape measure for large-wall accuracy
- Panel adhesive or mounting rail rated for your chosen panel weight
- End pieces and finishing trim matched to your panel finish
- How to calculate how many wall panels you need for ordering the right module count before installation day
What to do next
Once the grid is mounted and edges are finished, plan your lighting layout separately — LED channels behind a hexagon or slat grid change how the pattern reads at night versus daytime, and getting that wrong after the panels are fixed means redoing trim work you already finished.
FAQ
What is a panel grid layout on a feature wall?
A panel grid layout is a repeating pattern of wall panels — hexagon, slat, or tile format — arranged in a symmetrical module across a wall instead of installed as one continuous run. It's used on large feature walls in 2026 to keep seams and drift from becoming visible across a wide surface.
Should I start installing from the corner or the center?
Start from the center line, not the corner. Corners are rarely perfectly square, so a grid built outward from center absorbs any wall drift at the outer edges instead of down the middle where it's most visible.
What size are hexagon acoustic panels for a grid wall?
Hexagon acoustic panels run 32 inches wide and ship 4 panels per box, giving you a fixed, repeatable module to plan a grid pattern around on any wall size.
Do grid-pattern panels still absorb sound the same as a full slat wall?
Yes — hexagon and slat panels carry an NRC rating of 0.75 regardless of whether they're installed edge-to-edge or spaced into a grid pattern, so acoustic performance doesn't drop with a grid layout.
How many panels do I need for a large feature wall grid?
Panel count depends on your wall's width, height, and chosen module size; measuring both axes and mapping your grid before ordering avoids a mid-project reorder. A dedicated coverage guide walks through the math step by step.
Can I mix two panel finishes in one grid layout?
You can, but a single-tone grid in one finish like natural oak or black oak reads cleaner on a large wall — mixing finishes works best when used sparingly, such as alternating one accent row.
What do end pieces do in a panel grid installation?
End pieces close the raw, unfinished edge left at the end of a row or column, matching the panel's finish so the grid looks complete instead of cut off mid-pattern.
Is a panel grid layout harder to install than a standard slat wall?
It takes more planning up front — measuring, dry-laying, and marking centerlines — but the actual mounting process is the same. Most of the added difficulty is in the layout math, not the physical install.
One last thing
The wall that looks the most "designed" isn't the one with the most panels — it's the one where every module lines up at the same height across the full width, which is only possible if you marked your centerline before you picked up a single panel. Skip that step and no finish, however premium, will fix a grid that drifts by the time it reaches the far wall.




 Better performance and aesthetic appeal
 In Stock




