


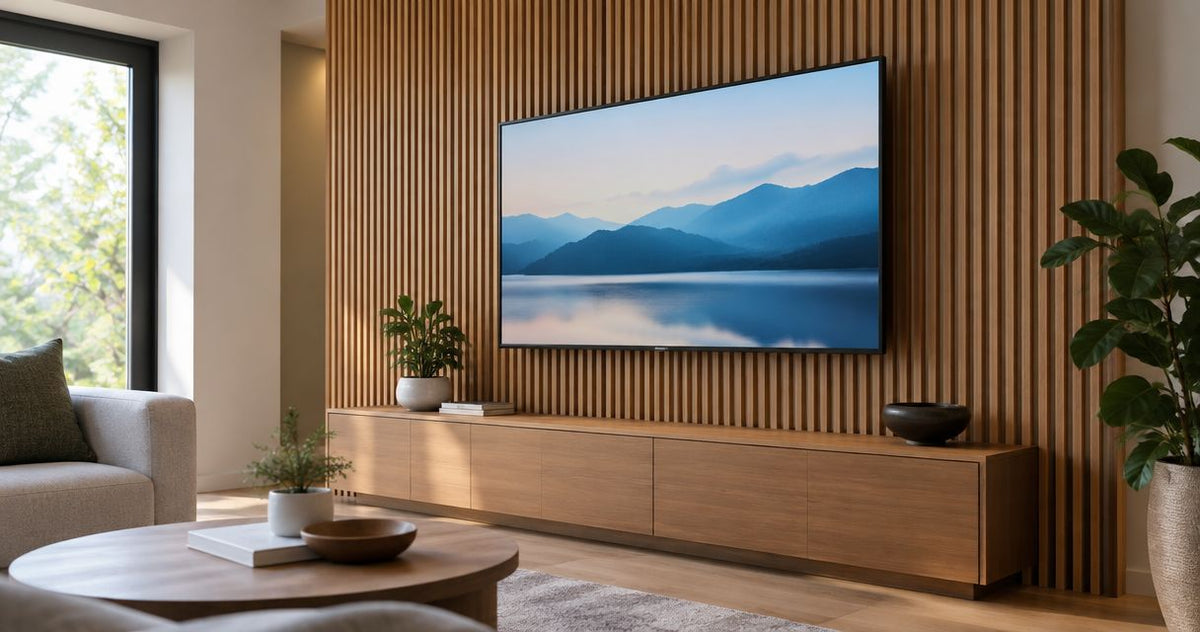
Instead of repeatedly adjusting your TV to disguise exposed hardware, hide the TV mount bracket behind a wood slat wall by fixing the bracket to suitable wall structure and fitting the panels around a concealed cutout. The TV covers the opening; the wood panels provide the finish, not the support.
- To hide tv mount bracket behind wood slat wall, anchor the mount independently and fit panels around its footprint.
- Akustiq USA acoustic slat panels suit decorative TV feature walls; do not treat them as structural mounting support.
- Keep mounting bolts, release mechanisms, electrical boxes, and TV ventilation accessible.
- Check side views and bracket movement before cutting wood slat panels or routing cables.
Why this matters
The cleanest installation hides the wall plate without trapping the mount behind permanent cladding. A bracket opening concealed by the TV lets you keep the slat pattern continuous across the visible wall while retaining access to hardware.
Akustiq USA acoustic slat panels are best for homeowners seeking a wood-finished TV feature wall, not structural TV support. Separate those functions from the start. Decorative slats and their backing are not a substitute for the mounting substrate specified in your bracket's instructions.
For a 2026 TV-wall project, work from the actual television, bracket, and panel assembly. The screen's outline alone does not tell you where the wall plate sits, how the release mechanism works, or whether the TV can move past the finished slats.
A cutout behind the screen conceals hardware from the front. It does not guarantee concealment when an articulating TV swings away from the wall.
Before you start
- Have the hardware and instructions on site. Gather the TV, compatible mount, mounting template, panel sample, measuring tape, level, suitable cutting tools, and eye and respiratory protection. Confirm the TV weight, mounting-hole pattern, and wall type against the mount manufacturer's instructions.
- Confirm the load-bearing substrate and cable route. Locate suitable structure and check for concealed services before drilling. Use a qualified installer when you cannot verify the wall construction or mounting method; use an electrician for outlet relocation or new electrical work.
- Check the hidden gotcha: removal access. Locate the bracket's release cords, locking screws, or latches before planning the panel cutout. A neat opening that blocks these parts can leave you unable to remove the television without damaging the wall.
Keep the Akustiq USA panel installation instructions beside the mount instructions. Your 2026 installation needs both: one governs the decorative finish, and the other governs TV support.
Choose the mounting arrangement
Use an exposed wall-plate cutout concealed by the TV as the default arrangement. This keeps decorative material out of the bracket's mounting interface and gives you a clear route to the fasteners.
Other arrangements require additional planning. Compare the installation methods before committing to a panel layout.
| Arrangement | Best for | Advantage | Limitation |
|---|---|---|---|
| Concealed cutout | A TV that covers the wall plate and opening | Keeps the bracket on its specified mounting substrate | The opening can become visible from the side or when the TV moves |
| Mount over panels | An assembly explicitly permitted by the mount manufacturer | Keeps the panel surface behind the bracket | Requires an approved fixing arrangement; decorative backing must not be relied on for support |
| Built-out wall | Projects already involving framing and electrical work | Allows coordinated support and cable planning | Adds construction work and needs a mounting design suited to the finished assembly |
Do not improvise a mounting stack with loose washers or unsupported spacers to preserve the appearance of uninterrupted slats. If the mount instructions do not cover your proposed assembly, obtain an approved installation method or change the layout.
Wall layout
- Mark the viewing position. Sit where you normally watch television and establish the screen position before marking the bracket. Use the mount template to translate the screen position into the wall-plate location; the plate is not necessarily centered behind the display.
- Draw 3 outlines. Mark the screen outline, wall-plate footprint, and proposed panel cutout separately. Include the space needed to reach fasteners and operate the release mechanism. Keep the cutout within the area the screen conceals.
- Check 2 viewing positions. Inspect the layout from your main seat and the most exposed side approach. Use a panel sample to represent the finished wall depth rather than judging against bare drywall.
- Dry-fit the slat pattern. Mark panel seams and slat lines around the opening. Shift the decorative layout, not structural fixing locations, when a seam or narrow slat fragment lands awkwardly beside the bracket.
Expected result: You have a screen position, a structurally feasible bracket location, and a cutout that remains hidden in the viewing positions you checked.
The sequence below applies to a 2026 installation using the concealed-cutout method. Finish the layout before making irreversible cuts.
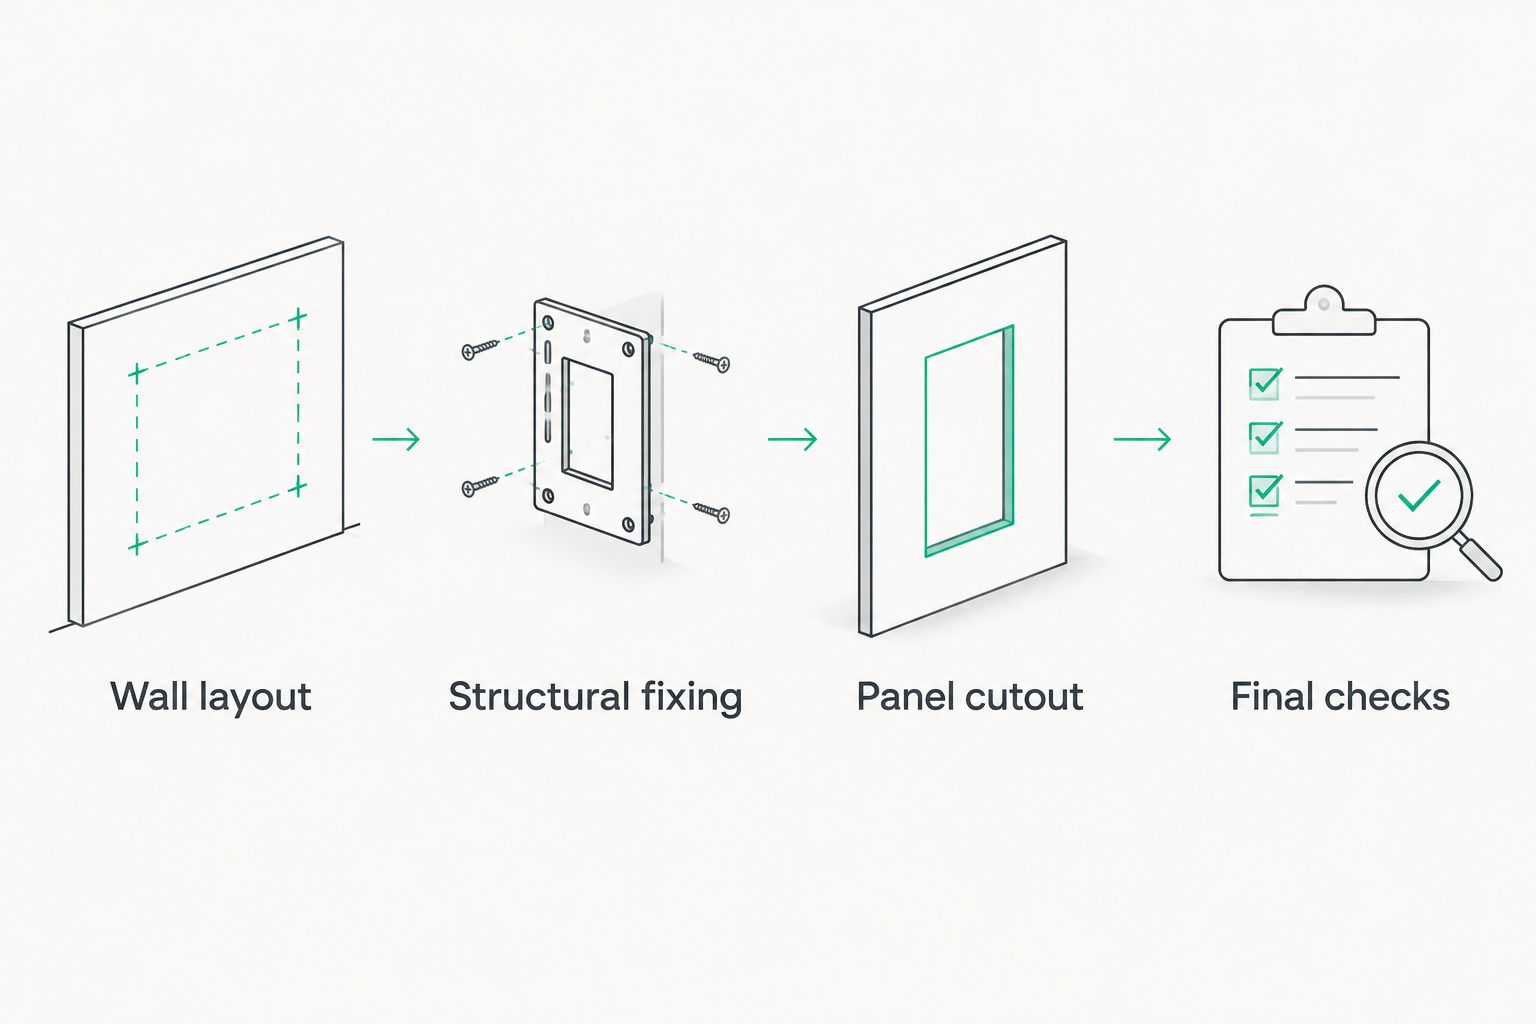
Structural fixing
- Verify the fixing locations. Identify the substrate required by the bracket instructions. Do not assume every detected stud or hollow-wall anchor is suitable for the mount, especially an articulating model.
- Install any required support first. Where the wall needs reinforcement, complete that work before installing decorative panels. Metal-stud walls, masonry, and uncertain wall assemblies need a fixing method appropriate to their construction.
- Attach the wall plate as instructed. Follow the manufacturer's requirements for fastener type, pilot holes, engagement, and tightening. Keep panel backing, adhesive, and loose decorative pieces out of the load-bearing interface for this cutout method.
- Check the installation before cladding. Confirm the plate is level and the specified fixings are correctly installed. Stop if the substrate, fasteners, or plate move unexpectedly; do not conceal an unresolved mounting problem.
Expected result: The wall plate is secured to suitable structure independently of the wood slat finish, with its fasteners still accessible.
Do not test the bracket by hanging from it or adding improvised weights. Follow the manufacturer's verification procedure and have questionable fixings inspected before hanging the TV.
Panel cutout
- Transfer the opening to the panels. Measure from fixed reference points and label the panel orientation. Recheck the opening against the installed wall plate rather than relying only on your original drawing.
- Support the panel before cutting. Use a stable work surface and a blade appropriate to the panel materials. Follow the panel manufacturer's cutting guidance, including which face should be presented to the blade.
- Cut and dry-fit the opening. Keep the panel clear of bolts, moving joints, and release mechanisms. Remove loose fibers and splinters, then hold the cut section in place to confirm the bracket does not obstruct the panel's seating.
- Fit the surrounding panels. Attach them using the specified installation method. Keep seams aligned and avoid small unsupported pieces beside the cutout. Do not use the mounting plate as a panel attachment point.
- Preserve electrical access. Leave receptacles and electrical boxes accessible with correctly fitted covers. Have an electrician address any box position affected by the added wall finish; do not bury a cover behind panels.
Expected result: The slat wall fits around the mount without pressing on its hardware, hiding fasteners, or covering electrical access.
The bracket opening should look deliberate even though the screen conceals it. A ragged cutout becomes visible during maintenance and makes future panel repairs harder.
Final checks
- Prepare the cables. Use cable routes appropriate to the cable type and local requirements. Do not run an ordinary TV power cord or extension cord inside the wall; use a compliant power arrangement installed as required.
- Hang and lock the television. Follow the mount instructions and get suitable assistance for lifting. Confirm that the TV engages the bracket and that its locking mechanism operates without interference from the panels.
- Run 1 complete movement check. For an adjustable mount, move the TV through its intended operating range. Watch for pinched cables, slat contact, tight connectors, and inaccessible release parts.
- Inspect the finished views. Check the front and side approaches with the screen in its normal position. Confirm the TV's required ventilation clearances against its manual, using the finished panel surface as the reference.
Expected result: The TV is secured, the bracket opening is concealed in normal use, and you can reach the connections and removal mechanism.
Do not close the project because the front view looks good. Cable strain and blocked release hardware often remain invisible until the television needs to move.
Variant: hide the bracket on an existing slat wall
For an existing slat wall, verify the structure before deciding whether the panels can stay in place. The decorative finish does not reveal what is behind it.
- Remove the television following the mount instructions, if one is already installed.
- Identify the mounting substrate and confirm the proposed bracket location.
- Remove an accessible panel section where practical, or plan a controlled cutout that avoids hidden services.
- Secure the mount independently, then refit or replace the surrounding decorative section.
- Repeat the movement, cable, ventilation, and removal-access checks.
Use removable panel sections when future servicing is a priority and the panel attachment method supports removal. The advantage is easier access; the drawback is that joints and attachment points need careful planning.
If the existing panels are bonded in place, removal can damage the backing or wall surface. Plan the repair before opening the finish, and do not cut blindly toward hidden wiring or the wall structure.
Troubleshooting
The bracket is visible from the side
Check whether the opening, wall plate, or extended arm is exposed. Adjust the decorative cutout only if hardware access and movement remain clear; full concealment at every swivel angle is not always possible.
The TV cannot fold back into its normal position
Identify whether the slats, connector plugs, or cable bundle create the obstruction. Rework the panel opening or cable arrangement rather than forcing the TV backward or altering the bracket outside its instructions.
Release cords or locking screws are trapped
Remove the TV using the manufacturer's procedure before modifying the opening. Restore access to the release parts, and never glue them behind the panel backing.
The panel cracks or moves as the mount is tightened
Stop tightening and remove the TV from service. The decorative assembly is being loaded or compressed; have the mounting interface corrected instead of tightening harder or concealing the damage.
Cables pull tight when the TV swivels
Re-route the cables and provide enough slack for the intended movement without creating a bundle that catches in the mechanism. Repeat the movement check while watching each connector and cable path.
Customize your workflow
Keep the structure fixed and customize the visible finish around it. Akustiq USA acoustic slat panels provide the decorative part of this workflow; panel color and seam placement do not change the mount's support requirements.
For a 2026 refresh, start with an actual sample beside the TV and existing furniture. Inspect the finish in your room lighting, then plan panel orientation and exposed edges before ordering the wall coverage.
Use the guide to cut acoustic wood slat panels to size for the panel-cutting stage. Keep bracket-specific clearances governed by the mount instructions, not by a decorative cutting guide.
FAQ
How do I hide a TV mount bracket behind a wood slat wall?
Fix the mount to suitable wall structure and fit the panels around a cutout concealed by the TV. Leave access to mounting bolts, release parts, electrical boxes, and connections.
Can I screw a TV bracket directly into acoustic slats?
Do not rely on acoustic slats or their backing to support the TV. The bracket needs the mounting substrate and fixing method specified by its manufacturer.
Should I install the TV bracket before the wood panels?
For the concealed-cutout method, install and verify the wall plate before fitting the surrounding panels. This lets you check the actual plate position and preserve access to its fixings.
Can I hide a full-motion TV mount completely?
A full-motion mount can remain visible when the TV swings away from the wall. Plan concealment for the normal viewing position without restricting the arm or covering its joints.
Can I run the TV power cord behind the slat panels?
Keep an ordinary TV power cord outside the wall and clear of the mount's moving parts. For concealed in-wall power, use a compliant arrangement installed according to local requirements.
How large should the bracket cutout be?
Size the cutout around the actual wall plate, required hardware access, and mount movement. Keep it within the screen's concealed area where possible; there is no universal cutout dimension.
Are Akustiq USA acoustic slat panels suitable for a TV feature wall?
Akustiq USA acoustic slat panels suit the decorative finish of a TV feature wall. Install the TV mount independently using a fixing arrangement approved for the wall and bracket.
One last thing
Check how you will remove the TV before calling the wall finished. For your 2026 installation, photograph the exposed bracket, fixing locations, and cable route before hanging the screen, then retain those photographs with the installation instructions.
A concealed bracket is successful only when it stays serviceable. The next cable change should not require cutting apart your accent wall.




 Better performance and aesthetic appeal
 In Stock




