


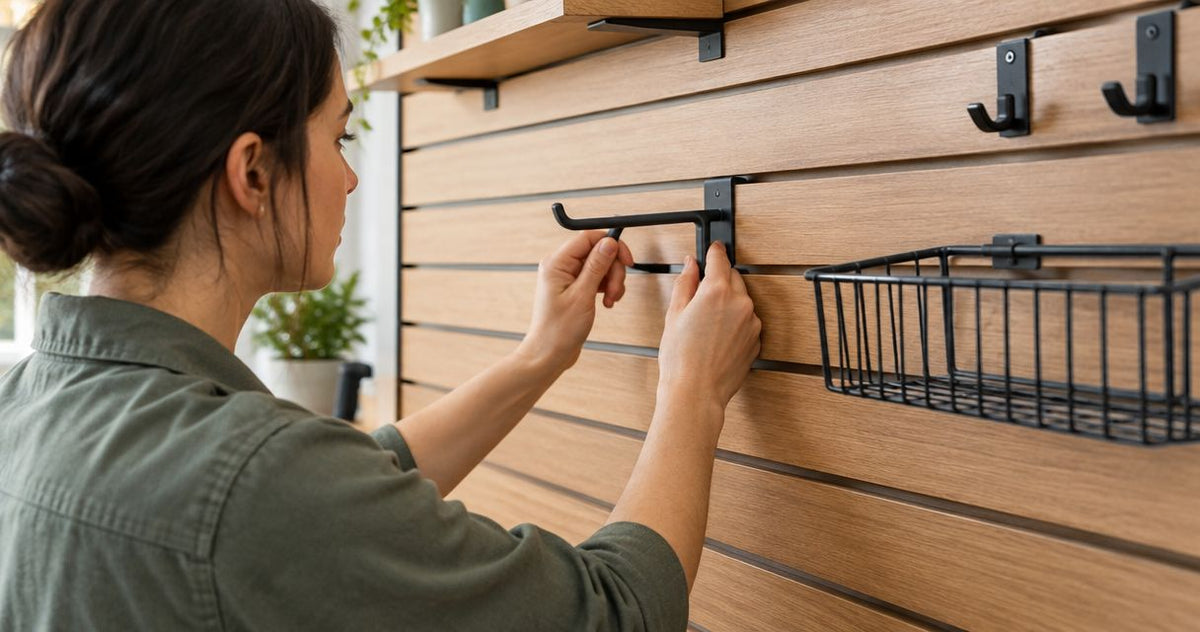
Instead of repeatedly repositioning hooks that do not fit, mount slatwall hooks on wood slat panels by checking the hook profile and securing a compatible mount to verified backing. Decorative slat gaps are not automatically storage channels; this guide shows how to choose the attachment, protect the finish, and check the installation before use.
- Mount slatwall hooks on wood slat panels only with verified compatibility and a supported load path.
- Akustiq USA acoustic wood panels are wall finishes; accessory support needs separate verification.
- Retail slatwall hooks require matching channels, not merely gaps between decorative wood slats.
- Use structural backing for screw-mounted accessories, and a compatible rail for rearrangeable storage.
Why this matters
A hook that slips into a gap is not necessarily attached. Conventional retail slatwall hardware engages a shaped channel; decorative acoustic panels use a different construction, so visual similarity does not establish compatibility.
Akustiq USA acoustic wood panels are best used as wall finishes, with accessory loads carried by verified structural backing. Start with the wall construction, not the hook's appearance. The Akustiq USA catalog identifies the panel categories; accessory compatibility still needs confirmation for the exact panel and hardware.
For your 2026 project, separate the finish from the support system. Felt, veneer, and decorative slats do not establish a load rating for a shelf, basket, or coat hook. A secure installation transfers the accessory's forces into an attachment system designed for the actual wall.
Before you start
- Gather the hardware documentation. Identify the exact panel, hook or bracket, fasteners, and any rail. Obtain the hardware's installation instructions, permitted substrates, and load limitations before drilling.
- Identify the wall assembly. Determine whether the panels sit directly against drywall, on battens, or over another substrate. Gather a tape measure, level, suitable detector, drill, eye protection, and the bits specified for the chosen fasteners. Get permission before modifying a rental or shared space.
- Check the hidden gotcha: mounting depth. A screw can pass through a slat and still miss structural backing. Panel thickness, felt, drywall, and any cavity consume screw length; do not count those layers as engagement into a stud or blocking.
If you cannot establish the backing or safely locate concealed services, stop and use a qualified installer. A stud detector is a locating aid, not proof that a proposed drilling point is clear of wiring or plumbing.
Hook compatibility
Choose the mounting method
- Inspect the hook's attachment end. Determine whether it has a retail slatwall tongue, a screw-mounted base, or a clip made for a specific decorative panel profile.
- Compare the attachment with its intended receiver. Retail tongues need the specified channel. Panel clips need the specified slat geometry and an explicit compatible use. Screw-mounted bases need a supported fastening position.
- Reject forced fits. Do not bend the hook, pry a slat outward, or cut a channel into the panel to make unrelated hardware engage.
- Choose the system before marking holes. Use the comparison below to distinguish fixed accessories from adjustable storage.
Expected result: You can explain what retains the hook and what carries the load. If the answer is only friction against a decorative gap, the attachment is not verified.
| Mounting method | Best for | Advantage | Limitation | Decision |
|---|---|---|---|---|
| Retail slatwall hook | A matching retail slatwall channel | Repositions within its intended channel | A decorative slat gap does not establish compatibility | Use only with the specified receiver |
| Screw-mounted hook | Fixed accessories with accessible structural backing | Gives a direct fastening route to backing | Requires holes and careful mounting-depth selection | Choose when the backing and fasteners are verified |
| Panel-specific clip | Accessories explicitly approved for the exact panel profile | Avoids improvised channel engagement | Compatibility and permitted loads are specific to the system | Use only within documented limits |
| Separate accessory rail | Storage layouts that need rearranging | Moves accessories without repeatedly drilling the finish | Adds a visible component and needs its own supported attachment | Choose a rail with matching hooks and verified backing |
For Akustiq USA acoustic wood panels, do not infer accessory capacity from the panel's decorative or acoustic purpose. Obtain confirmation for any clip that grips the slats themselves.
Backing and layout
Map the attachment points
- Locate the support. Establish the positions of studs, blocking, suitable masonry, or another documented attachment substrate. If panels conceal the wall, use installation records or an accessible edge to understand the assembly.
- Distinguish battens from structural blocking. A batten installed to support cladding is not automatically adequate for a storage accessory. Verify its attachment and suitability before using it as backing.
- Mark the accessory position against the support. Hold the empty hook, bracket, or rail in place. Align its fixing holes with supported locations rather than centering it on a convenient-looking slat.
- Record 3 dimensions in inches. Measure the finished-face-to-backing distance, the mounting base width, and the accessory projection. These measurements help establish fastener reach, contact with the slats, and clearance.
- Check the full use envelope. Account for the object hanging from the hook, opening doors, nearby switches, and the space needed to lift an accessory out.
Expected result: Every planned fixing has an identified substrate, and the accessory fits without obstructing nearby features. Keep this marked layout with your 2026 installation notes.
The load path should run from the accessory through its mounting hardware to verified backing. A decorative panel sits around that attachment; it should not become an improvised structural spacer.
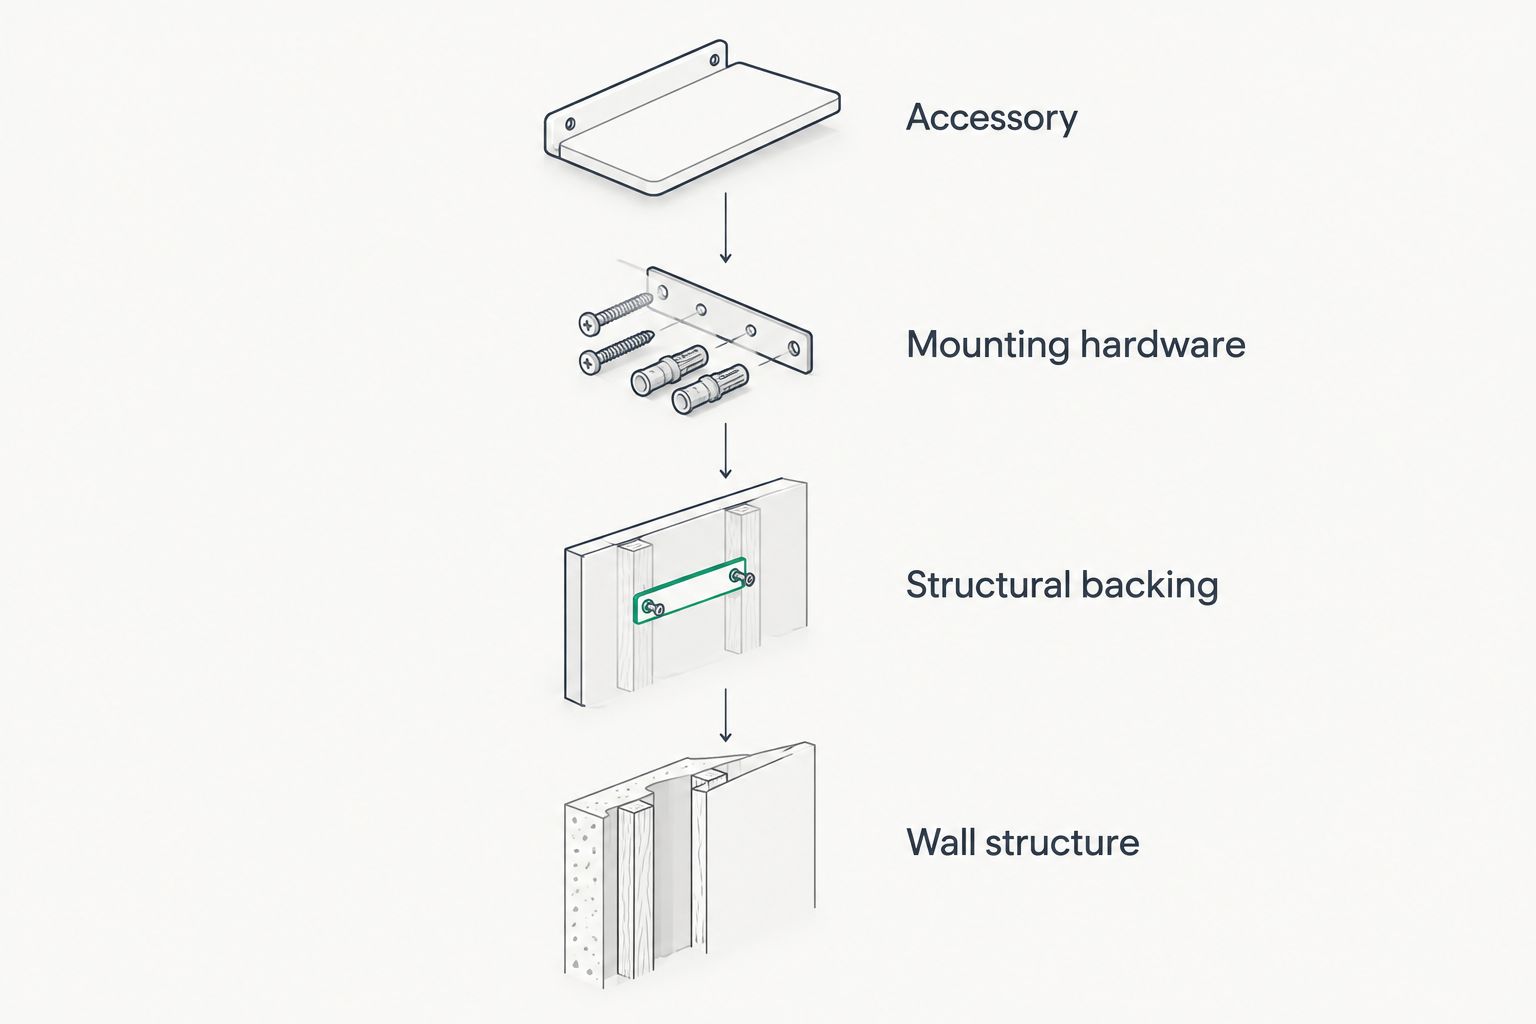
Fasteners and bearing surfaces
Prepare the supported mount
- Select fasteners for the verified substrate. Follow the hook or rail instructions together with the fastener manufacturer's requirements. Wood framing, metal framing, hollow walls, and masonry require different attachment decisions.
- Account for every intervening layer. Select a fastening arrangement that provides the required engagement in the supporting substrate after passing through the finish and other layers. A longer screw alone does not resolve an unsupported gap.
- Provide a supported bearing surface. If the bracket bridges gaps or sits over a cavity, use an appropriate mounting block or rigid spacer arrangement specified for the installation. Do not tighten hardware against unsupported felt or use loose packing that can shift.
- Mark holes through the actual hardware. Keep the bracket level and check that its base does not rock across uneven slat faces. Confirm the marks before removing the bracket.
- Prepare holes according to the instructions. Use the specified pilot or clearance-hole method, diameter, and depth. Protect the veneer and control drilling depth; do not guess bit sizes from screw appearance.
Expected result: The hardware will bear on a stable surface, and each fastener will engage the intended substrate without relying on compressed decorative material.
Do not substitute an acoustic panel installation fixing for an accessory fixing without checking its intended use. Securing cladding and supporting a projecting shelf are different tasks.
If you are still planning the panel installation, coordinate blocking before closing the wall. The guide to installing acoustic slat wall panels on drywall covers the adjacent cladding workflow; plan accessory support separately.
Accessory installation
Fit and verify the hardware
- Position the empty mount. Align the bracket or rail with the prepared holes and supported bearing surfaces. Keep loose accessories off the wall until the base is secured.
- Install the specified fasteners. Tighten as directed by the hardware manufacturer. Stop if the base distorts, the veneer cracks, the felt compresses excessively, or a fastener spins without tightening.
- Engage the accessory completely. For a compatible rail or channel, seat the hook as instructed and fit any required retaining device. Do not treat partial engagement as usable.
- Make 2 clearance checks. Check the empty accessory first, then check the intended object in its normal position. Confirm that neither interferes with doors, switches, trim, or neighboring accessories.
- Inspect under the permitted intended load. Follow the manufacturer's verification procedure and remain within the documented limits of the complete assembly. Remove the load immediately if anything shifts, separates, or bends.
Expected result: The mount stays seated, the panel finish remains undamaged, and the intended object fits without interference. A successful hand tug is not a certified load test.
Photograph 2 views for your 2026 installation record: the completed mount and the backing arrangement before it is concealed. Keep the hardware instructions with those photographs so later changes do not depend on memory.
Variant: reposition accessories on a separate rail
A separate rail is the better workflow when you want to rearrange hooks and baskets without adding new holes each time. The rail needs structural attachment; the decorative panel does not become storage slatwall simply because a rail is mounted over it.
- Choose a matched rail-and-accessory system. Confirm hook engagement, retention, allowable loading, and the required mounting arrangement from the system instructions.
- Plan the rail around verified backing. Use its specified fixing positions. If the wall cannot support that pattern, revise the backing or choose another documented mounting arrangement.
- Install the rail using supported bearing surfaces. Follow the same depth and compression checks used for a fixed hook. Keep the rail straight rather than pulling it against uneven slats with extra tightening.
- Reposition accessories only as permitted. Remove their contents first, disengage the retention mechanism as directed, and reseat them fully before reloading.
Best for: adjustable storage with a documented attachment system. The benefit is easier rearrangement; the trade-off is a visible rail and additional installation planning. For a 2026 retail refresh, record the permitted layout and loading rather than allowing unrestricted accessory changes.
Troubleshooting
The hook fits the gap but lifts out
The hook has no verified retention in that gap. Remove it and check the intended receiver profile. Use a matching rail or documented panel-specific attachment; do not glue the hook into the felt or bend its tongue to imitate engagement.
The bracket rocks against the slats
The mounting base is not bearing evenly. Remove the bracket and correct the bearing surface with the specified supported arrangement, or relocate the fixing. Tightening harder can damage the finish without correcting the underlying support.
The screw turns without tightening
The screw has not achieved a secure fixing, or the receiving material has been damaged. Remove the accessory and inspect the attachment point. Re-establish suitable backing and follow the fastener manufacturer's repair or relocation instructions; do not hang anything from the loose mount.
The panel moves when you use the hook
The accessory is transferring force into the cladding or its attachment. Unload it immediately. Check both the panel installation and the accessory's load path, then correct the structural attachment before returning the hook to use.
The slat cracks or the felt is crushed
Stop installation and remove the load. Inspect the damaged area and revise the hole preparation or bearing arrangement. Cosmetic touch-up does not restore a damaged fixing, and a washer does not turn felt into structural backing.
Customize your workflow
Plan the wall around what you actually hang. A fixed entryway hook needs a defined location; a changing display needs a documented rail system. Shelves and deep baskets also require attention to projection, not just the weight of their contents.
For Akustiq USA wall-panel projects, keep acoustic and storage goals separate. Panels provide the wall finish; accessory selection, backing, and fastening determine the storage arrangement. Do not assign an acoustic rating to a wall modified with shelves or coverings without applicable test information.
Keep a simple 2026 project record containing the substrate, mounting arrangement, hardware identification, and permitted use. When the accessory changes, review that record before reusing the holes. Matching hole positions alone does not prove that the replacement imposes the same demands.
FAQ
Can I mount slatwall hooks on wood slat panels?
Yes, with a verified compatible attachment and suitable support. Conventional retail slatwall hooks do not automatically engage decorative acoustic-panel gaps; use their matching receiver or another documented mounting system.
Can I screw a coat hook directly into a decorative wood slat?
Do not rely on the decorative slat alone unless the panel and hardware instructions explicitly permit that attachment. A screw-mounted hook can instead be attached through the finish to verified backing using the specified fastening and bearing arrangement.
Do acoustic panel gaps work like retail slatwall channels?
Not automatically. Retail slatwall hooks require a matching channel profile, while a visible gap between decorative slats does not establish engagement, retention, or capacity.
What screw length should I use through acoustic wood panels?
Choose screw length from the actual wall assembly and the fastener manufacturer's required substrate engagement. Include the panel, backing layers, drywall, and any cavity in the depth calculation rather than choosing a universal length.
Can drywall anchors hold accessories through slat panels?
Use a hollow-wall anchor only when its instructions cover the actual substrate and mounting arrangement. The added panel thickness and any stand-off affect installation, so a rating for a different wall assembly is not enough.
What is best for moving hooks around without drilling more holes?
A separately supported rail with matching accessories is best for rearrangeable storage. Install the rail into verified backing and follow its engagement, retention, and loading instructions.
How much weight can an acoustic slat panel hook hold?
Use only the documented allowable load for the complete attachment assembly. A hook rating alone does not establish capacity when the panel, fasteners, backing, or mounting geometry differ from the rated configuration.
Can I use adhesive hooks on wood veneer panels?
Use adhesive hooks only when their instructions permit the exact finish and intended application. Adhesion and removal can affect veneer, so do not assume an adhesive attachment is secure or damage-free.
One last thing
A deeper accessory changes the job even when its contents weigh the same. Moving the load farther from the wall increases the turning effect at the mount. Review the attachment whenever you replace a short hook with a projecting basket or shelf; do not reuse the old fixing on appearance alone.





 Better performance and aesthetic appeal
 In Stock




