


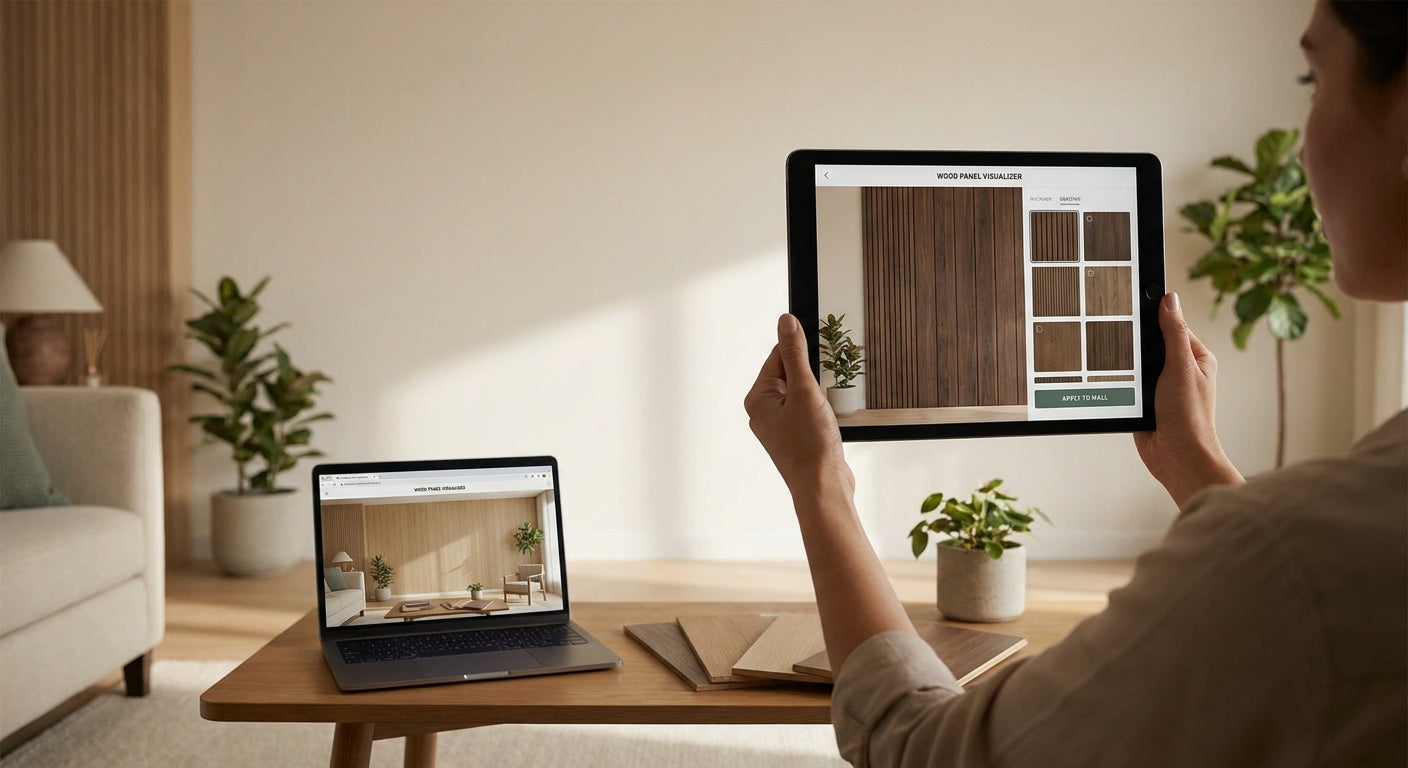
A wood panel visualizer tool online lets you drop Walnut, Natural Oak, or Black Oak finishes onto a photo of your actual wall before you spend money on samples — this walks through exactly how to use one so the render matches what shows up on your wall in 2026.
- Use a wood panel visualizer tool online to preview Walnut, Natural Oak, and Smoked Oak finishes on your own wall photo before ordering anything in 2026.
- The $10 Full Sample Box is still the final word — screens shift color temperature, wood grain doesn't move with your monitor brightness.
- Felt-backed Hexagon Acoustic Panels (NRC 0.75) render lighter on-screen than under warm LED light — verify with a physical sample before a full order.
- Photograph your wall in daylight, upload it, layer 2-4 finishes, then shortlist before you buy — skipping the photo step is the most common visualizer mistake.
Why this matters
A visualizer saves you from ordering the wrong finish twice. Wood grain, felt backing, and panel spacing all read differently on a 6-inch phone screen than on a 9-foot wall, and the gap between the two is where returns and re-orders happen.
Most buyers skip straight from a product photo to checkout. That's how a Smoked Oak order shows up looking almost black in a room lit by warm bulbs, or how a hexagon layout that looked tight on-screen turns out too busy for a small hallway. A visualizer closes that gap before the order goes in — a physical sample closes what's left.
What you'll need
- A clear photo of your wall, shot in daylight, no filter or auto-enhance applied
- Wall dimensions in inches (width x height) so the visualizer scales the panel correctly
- A shortlist of 2-4 finishes to compare side by side — pulling from Walnut, Natural Oak, Black Oak, and Smoked Oak covers most rooms
- Budget for a physical check afterward — the Full Sample Box runs $10 and covers Natural, Smoked Oak, and Walnut
- 15 minutes and no software install — most visualizer tools run in-browser
The steps
1. Photograph your wall in natural daylight
Shoot the wall straight-on between 10am and 2pm, with curtains open and no flash. Flash and evening light both push warm or cool color casts that throw off every finish comparison you make afterward. Common mistake: photographing under a single warm ceiling bulb, which makes every finish read 1-2 shades darker than reality.
2. Upload the photo and set your wall dimensions
Enter the width and height in inches so the tool scales panel size correctly — a 32-inch hexagon panel needs to look like 32 inches, not 12. This step is what separates a useful preview from a decorative guess. Common mistake: skipping dimensions and eyeballing scale, which makes hexagon and fluted layouts look wrong on both ends.
3. Layer in 2-4 finishes side by side
Don't visualize one finish alone — compare Walnut against Natural Oak against Smoked Oak in the same render so the differences are obvious immediately. Side-by-side comparison is how you catch that Black Oak reads almost identical to Smoked Oak on some screens. Common mistake: falling in love with the first finish rendered and skipping the comparison step entirely.
4. Toggle the lighting condition to match your room
If the tool offers a daylight/evening toggle, use it — a finish that looks warm and inviting under daylight can go flat or muddy under yellow LED at night. Most living rooms and bedrooms get used more in the evening than during the day, so that toggle matters more than the default view. Common mistake: judging the whole finish off the default daylight render only.
5. Shortlist two finishes and order physical samples
Once you've narrowed to 2 finishes on-screen, stop visualizing and order real material. The process for ordering acoustic wall panel samples before buying exists specifically for this step — a $2.50-$10 sample check is cheaper than a wrong full-wall order. Common mistake: skipping the physical sample because the visualizer render looked convincing.
6. Hold the sample against the wall at the time of day you'll actually see it
Check the sample under the same lighting you used for your photo, then again in the evening. Wood veneer shifts more under artificial light than any screen render shows, especially on felt-backed finishes with an NRC 0.75 acoustic rating. Common mistake: checking the sample only in daylight and never testing it under evening lighting.
7. Confirm quantity before you order the full run
Measure your wall coverage and cross-check it against a coverage guide before placing the final order — visualizers show finish, not exact panel count. Common mistake: ordering the visualizer's suggested quantity without measuring the actual wall area.


Troubleshooting
Colors look washed out on screen. Monitor brightness and auto white-balance flatten wood grain contrast — trust the physical sample over the render for final color decisions, always.
Panel scale looks wrong in the preview. This almost always traces back to skipping the wall-dimension input in step 2 — re-enter your measurements in inches rather than estimating by eye.
Hexagon layout looks too busy in the render. Try halving the coverage area in the tool first — a single accent section often reads better than covering an entire wall, especially in rooms under 120 square feet.
Felt-backed finishes look darker than expected. Gray felt backing on Hexagon Acoustic Panels changes how light reflects off the veneer edge — request the felt-backed sample specifically rather than judging from the plain-veneer render.
The visualizer doesn't support your exact panel type. Fluted and 3D wood tile profiles render differently than flat slat panels — if the tool only offers a flat preview, weight your decision more heavily toward the physical sample for textured finishes.
Sample doesn't match the visualizer at all. This points to a lighting mismatch, not a bad tool — reshoot your reference photo in daylight and re-run the comparison before assuming the finish is wrong.
Tools and resources
- Full Sample Box — already linked above, covers Natural, Smoked Oak, and Walnut in one $10 order
- Walnut sample — single-finish check for anyone who's already narrowed to one color
- Hexagon Panel samples with gray felt backing — shown in the product cards above, useful for confirming NRC 0.75 acoustic finishes specifically
- A tape measure and your wall dimensions in inches, not feet — most visualizers expect inch input
- Two lighting checks: one daytime, one evening, before any full-wall order goes in
What to do next
Once your finish is confirmed, the next decision is quantity. Calculating how many wall panels you need walks through coverage math so you don't over-order or come up short on a feature wall.
FAQ
What is a wood panel visualizer tool online?
It's a browser-based tool that overlays a panel finish onto a photo of your wall so you can compare colors and layouts before ordering. It's a preview step, not a substitute for a physical sample.
Is a wood panel visualizer accurate for color matching?
It's close but not exact — screen brightness and color calibration shift how wood veneer reads on different devices. Always confirm the shortlisted finish with a physical sample before a full order.
How much does it cost to order acoustic wood panel samples?
Individual samples run around $2.50 to $5, and the Full Sample Box covering Natural, Smoked Oak, and Walnut costs $10. That's a small cost against re-ordering a wrong finish for a full wall.
Can I use a visualizer for hexagon acoustic panels?
Yes, most tools support hexagon layouts, but scale and grain detail render less accurately on angled shapes than on flat slat panels. Check dimensions carefully and confirm with a Hexagon Acoustic Panel sample before ordering.
Do I still need physical samples if I already used a visualizer?
Yes — a visualizer narrows your options, a physical sample confirms them. Wood grain and felt backing shift under real lighting in ways no screen render fully captures.
What's the difference between Walnut and Smoked Oak panel finishes?
Walnut runs darker and warmer with more visible grain contrast, while Smoked Oak leans cooler and more uniform. Under warm evening light, the two can look closer together than they do in daylight photos.
How many samples should I order before buying a full wall of panels?
Two to three samples covers most decisions — enough to compare your top finishes without over-spending on samples you won't use. The Full Sample Box at $10 covers three finishes in one order.
Does lighting affect how wood panel finishes look in a visualizer?
Yes, significantly — a finish that looks warm under daylight can shift muddy or flat under evening LED light. Toggle lighting conditions in the visualizer and check your physical sample at both times of day.
One last thing
Felt-backed Hexagon Acoustic Panels carry an NRC 0.75 acoustic rating, and that felt layer changes light reflection enough that the same finish can look a full shade lighter on-screen than it does under a warm bulb at 8pm. If acoustic performance matters as much as color to you, request the felt-backed sample by name — don't assume the plain-veneer render tells the whole story.



 Better performance and aesthetic appeal
 In Stock




