


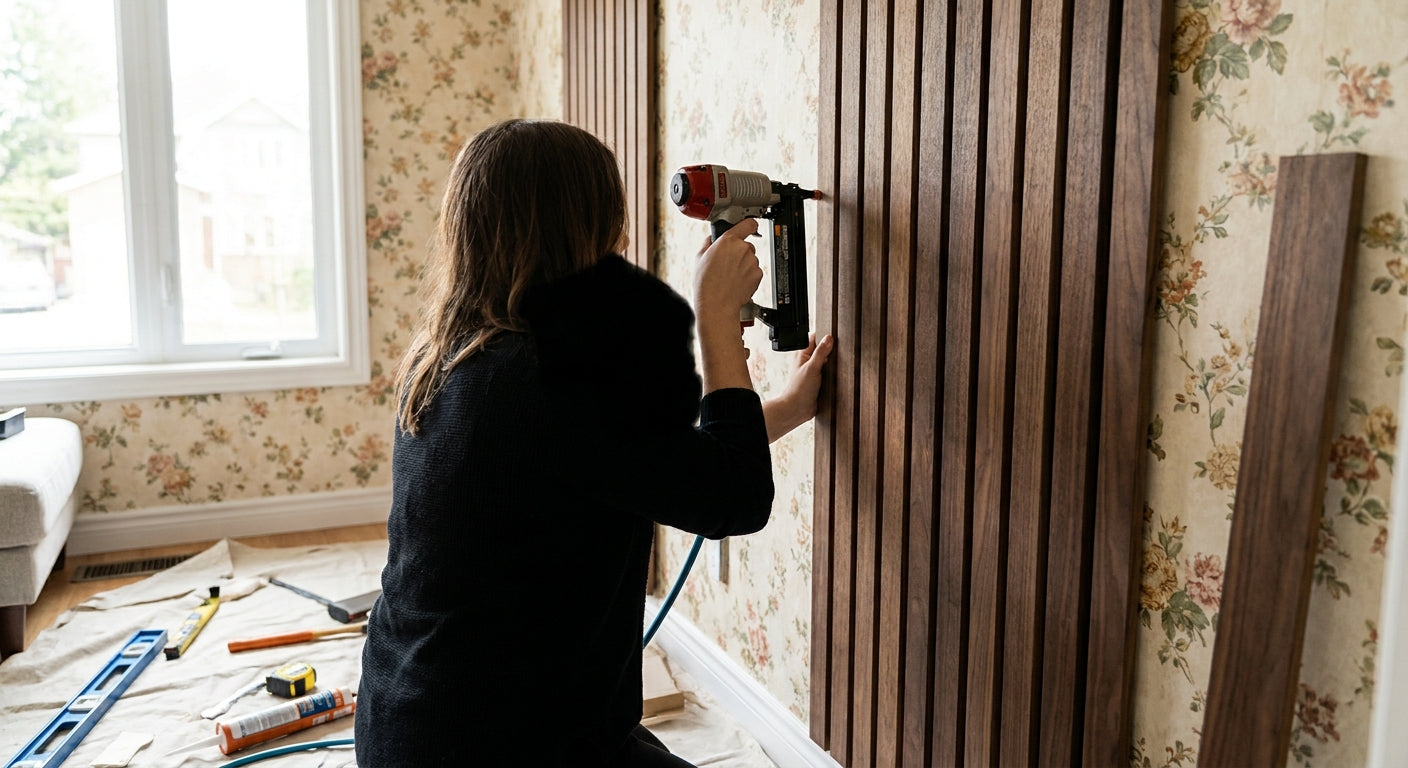
Old wallpaper does not have to come down before you hang wood slat panels — but glue it directly to vinyl or paper wallcovering and you will be re-doing the wall inside a year. This guide covers the furring-strip method that actually holds, plus the prep checks that tell you when stripping the wallpaper first is non-negotiable.
- Installing wood slat panels over wallpaper works only with furring strips or a plywood backer, never direct adhesive.
- Press-test the wallpaper every 2 feet; loose seams or bubbling means strip it before you start.
- Furring strips on 16-inch stud centers hold an Akuwood Panel slat panel flat over uneven old wallpaper.
- Peel a wallpaper corner first: mold or water stains underneath mean stop and remediate before paneling.
- Order a sample box before buying full runs; veneer tone shifts under different room lighting.
Why this matters
Wallpaper paste and vinyl coating are the two worst surfaces for construction adhesive. Adhesive bonds to the wallpaper's top layer, not the drywall underneath, so the whole assembly can peel off the wall as one sheet months later. That is the single most common failure reported by DIYers who skip furring strips.
Wood slat panels also carry real weight once you factor in a full wall run, and an acoustic slat wall panel in natural oak needs a mechanically fastened surface behind it, not a floating layer of old wallcovering. Furring strips solve both problems: they give you a flat, stud-anchored surface and they let air circulate behind the panel, which matters if the wallpaper was ever exposed to moisture.
What you'll need
- Stud finder and chalk line
- 1x2 or 1x3 furring strips, enough to run every 16 inches on-center across the wall
- Wood screws, 2.5 inches minimum, rated to reach the stud through drywall and furring strip
- Level (4-foot minimum) and a laser level for long runs
- Construction adhesive rated for wood-to-wood bonding
- Finish nailer or panel adhesive clips, depending on your panel's mounting system
- Miter saw or fine-tooth handsaw for trimming panel width and furring strips
- A full sample box of slat wall panels to check color and grain under your actual room lighting before ordering full boxes
- Safety glasses, dust mask, and a utility knife for spot-checking wallpaper adhesion
The steps
1. Inspect the wallpaper before you touch a tool
This step decides whether the rest of the job is easy or a redo. Peel back a corner in an inconspicuous spot and look for discoloration, softness, or a musty smell. Any of those signals trapped moisture, and sealing that behind a wood panel in 2026 or any other year is how mold problems start.
Common mistake: skipping this because the wallpaper looks fine on the surface. Surface condition tells you nothing about what is happening at the seams or behind the paper.
2. Press-test adhesion across the whole wall
Press firmly on the wallpaper every 2 feet, paying extra attention to seams and corners. Bubbling, flexing, or a hollow sound means the paper has separated from the drywall in that spot.
If more than roughly 20% of the wall fails this test, strip the wallpaper first. Furring strips fastened into loose paper will eventually work themselves free even when the screws hit the stud correctly.
Common mistake: testing only the middle of the wall and missing loose edges near the ceiling or baseboard, which is where old wallpaper separates first.
3. Map and mark your studs
Run the stud finder across the full wall height and mark every stud with a light pencil line. Standard framing puts studs 16 inches on-center, but older homes sometimes run 24 inches, so confirm rather than assume.
This step gives you the actual structural anchor point for everything that follows. Get it wrong and your furring strips are screwed into drywall alone, which will not hold panel weight over time.
4. Install furring strips over the wallpaper
Cut 1x2 or 1x3 strips to the wall height and screw them through the wallpaper into each marked stud, spacing screws every 12 to 16 inches down the strip. Use a level on each strip before driving the final screws. This is your last chance to correct for a wall that is not perfectly plumb.
Expected outcome: a flat, screwed-down grid you can mount panels to without ever touching the wallpaper's adhesive layer.
Common mistake: using adhesive alone to hold furring strips to the wallpaper instead of screwing into studs. Adhesive-only furring strips inherit every weakness of the wallpaper bond you were trying to avoid.
5. Dry-fit your first panel before committing
Hold the first slat panel against the furring strip grid and check plumb with a level before applying adhesive or nails. Mark reveal lines if your layout calls for even spacing between panel edges.
This is also the point to confirm your panel choice reads right against the room. An end piece slat wall panel in natural oak at the wall's edge gives you a finished slat profile instead of a cut, exposed one.
6. Mount panels to the furring strips
Apply construction adhesive to the back of the panel in a bead pattern, then press it onto the furring strips and secure with a finish nailer or the panel's clip system. Check plumb again immediately. Adhesive sets fast, and a crooked first panel throws off every panel after it.
Common mistake: rushing panel two before the adhesive on panel one has grabbed. Give each panel 60 to 90 seconds of firm pressure before moving to the next.
7. Finish the edges and corners
Run corner trim or end pieces at every outside edge, window return, and where the panel run meets a different wall finish. This is the detail that separates a clean, intentional installation from one that reads as unfinished, and it is where most DIY slat wall projects lose points on resale walkthroughs.


Troubleshooting
- Screws spin loose in the wall. You missed the stud. Pull back 1 inch and probe again with the stud finder before re-driving. Never rely on drywall anchors alone to carry furring strips over wallpaper.
- Furring strip bows away from the wall. Old wallpaper has a raised seam behind it. Sand down the high spot or shim the strip with thin cedar shims until it sits flat.
- Wallpaper bubbles up around a screw. Normal at first. If bubbling spreads, the paper is separating in that zone. Stop, cut a section out with a utility knife, and screw directly into exposed drywall.
- Musty smell after opening a wallpaper corner. Stop the install. Address moisture and mold before any panel goes up; a wood slat panel over a damp wall traps the problem instead of solving it.
- Panel color looks different once installed than it did on the sample. Room lighting shifts veneer tone more than most people expect, which is exactly why ordering a sample box before the full order matters.
- Seams between panels do not sit flush. Check that every furring strip is on the same plane with a long straightedge before blaming the panels themselves.
Tools and resources
Beyond the furring strip hardware, keep a laser level on hand for runs over 8 feet. A 4-foot level compounds small errors across a full wall. If you are covering more than one wall, work out panel count before you order; guessing on quantity is the most common reason installs stall mid-project waiting on a reorder.
What to do next
Drywall behind the wallpaper changes almost nothing about the mounting mechanics once furring strips are down, but the surface prep steps differ enough that it is worth reading the dedicated walkthrough on installing acoustic slat wall panels on drywall if part of your wall has no wallpaper at all.
FAQ
Can you install wood slat panels over wallpaper without removing it?
Yes, if the wallpaper passes a press-test with no bubbling or loose seams and you mount panels on furring strips, not directly with adhesive. Wallpaper that fails the test needs to come down first.
Is it better to strip wallpaper before paneling?
Stripping is safer when more than roughly 20% of the wall shows loose seams or moisture damage. For sound, well-adhered wallpaper, furring strips over the top save time without weakening the install.
What adhesive works on wallpaper for wood panels?
None reliably. Construction adhesive bonds to the wallpaper's surface layer, not the wall itself, so the whole assembly can separate later. Furring strips screwed into studs are the standard fix.
How much does it cost to install slat panels over an existing wall finish?
Cost scales with furring strip material and panel choice rather than the wallpaper itself, since prep adds hardware, not labor-intensive stripping, when the wallpaper is sound.
Do furring strips reduce room size noticeably?
A 1x2 furring strip plus panel thickness typically adds under an inch to the wall depth, which is negligible in most rooms.
What causes mold under wallpaper before a panel install?
Trapped moisture from a prior leak or high humidity with no ventilation behind non-breathable wallpaper. Any musty smell or discoloration found when checking the wall means remediation before paneling, not after.
Should I buy a sample before ordering full wood panel boxes?
Yes. Veneer tone reads differently under artificial versus natural light, and a sample box catches mismatches before you have committed to a full room order.
Can slat panels go directly over textured or embossed wallpaper?
Not directly. Texture under a panel telegraphs through seams and prevents a flat mount. Furring strips bridge the texture and give panels a flat surface regardless of what is underneath.
One last thing
The wall detail nobody checks until it is too late: outlet and switch boxes. Furring strips plus panel thickness push the wall surface forward by roughly an inch, and code requires switch and outlet boxes to sit flush with the finished surface, not recessed behind it. Budget for box extenders before you close up the wall, not after the inspector flags it.




 Better performance and aesthetic appeal
 In Stock




